EN
EN


Retrograde Intramedullary Nailing for Periprosthetic Femoral Fractures After TKA: AO Standardized Surgical Strategy – Illustrated Step-by-Step Guide
1. Illustration Legend
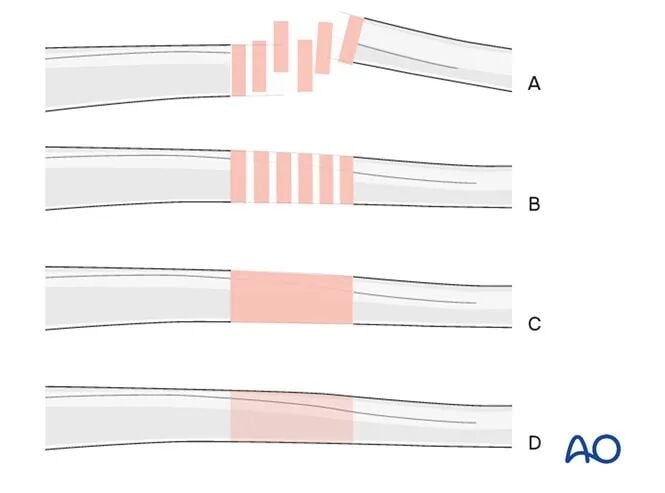
All images in this procedure are generic fracture classification schematics, divided into four categories:
A) Fracture unreduced
B) Fracture reduced
C) Fracture reduced and temporarily stabilized
D) Final definitive fixation
2. Surgical Principles
Intramedullary nailing provides stable fixation that allows early weight-bearing, causes minimal disturbance to fracture-site blood supply, has good biocompatibility, and generally does not compromise healing potential. However, if the femoral stem has a closed box-type design, intramedullary nailing cannot be performed.
In elderly osteoporotic patients, the femoral medullary canal has weak bone stock; reaming may be omitted or only minimal gentle reaming performed.
The maximum nail diameter is limited by the proximal opening size of the femoral component. The largest-diameter nail that fits within this constraint should be used.
3. Preoperative Preparation and Surgical Approach
Patient positioning
Supine position with the knee flexed 30°.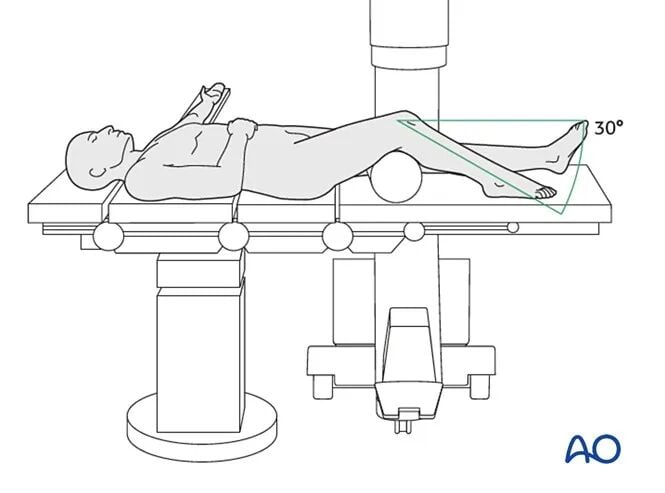
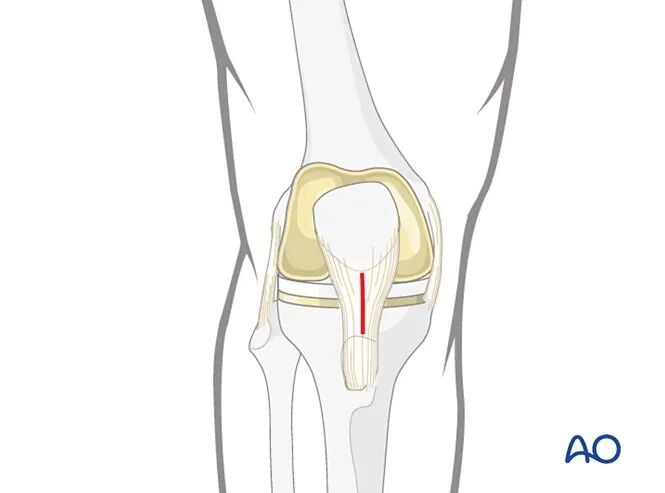
Surgical approach
Retrograde femoral intramedullary nailing approach.
4. Fracture Reduction
A variety of techniques can assist reduction of distal femoral fractures.
Most fractures can be reduced by manual traction alone. For more complex fractures, dedicated instruments are useful: femoral distractor, Steinmann pins, bone hooks, pointed reduction forceps, and coaxial reduction forceps.
In rare cases, open reduction is required; if necessary, periosteal stripping must be minimized.
Correction of three major deformities
1. Varus/valgus deformity (coronal plane alignment)
Assess coronal alignment by direct visual assessment of reduction and comparison of bilateral lower limb mechanical axes. Preoperative preparation of both lower limbs (simultaneous draping) facilitates comparison.
2. Rotational deformity
Assess rotational alignment by direct visual assessment and comparison of bilateral lower limb torsion profiles. Simultaneous draping of both limbs aids comparison.
3. Flexion-extension deformity (sagittal plane alignment)
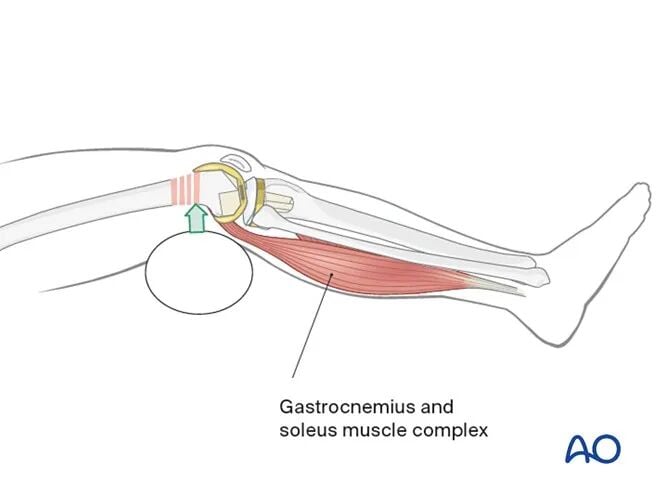
Counteract the tendency of the distal fragment to displace due to traction from the gastrocnemius muscle.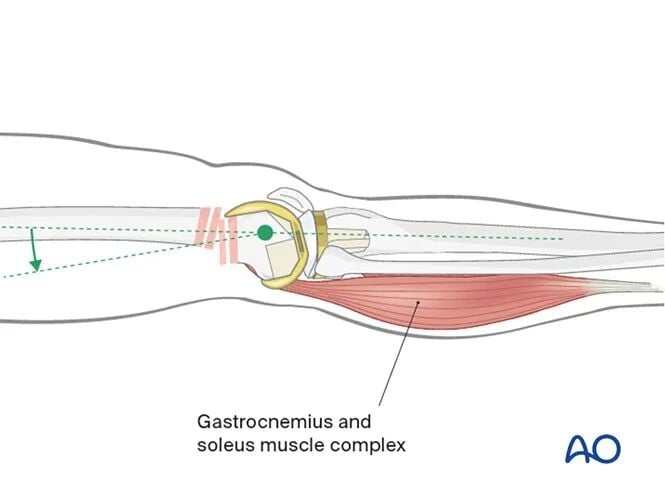
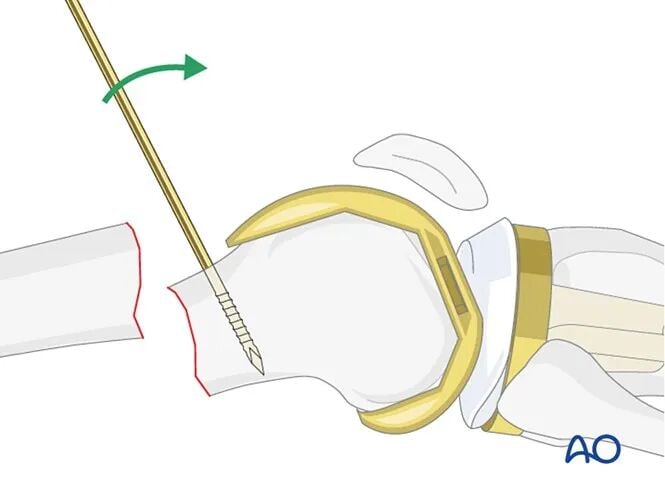
Place a soft bump under the knee to assist reduction by flexing the knee. If fracture morphology permits, insert a sagittal guide pin into the condylar fragment as a joystick, correct flexion-extension deformity first, then apply interfragmentary compression.
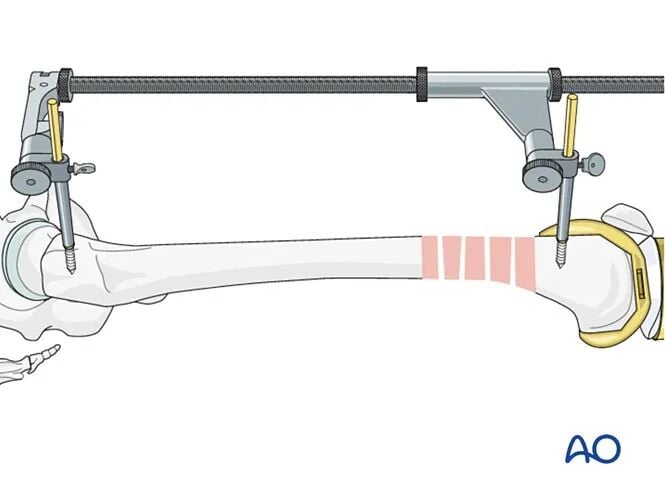
Femoral distractor
The Steinmann pins must be placed to avoid the intramedullary nail path. The distractor provides continuous, stable axial traction, achieving better reduction than manual traction.
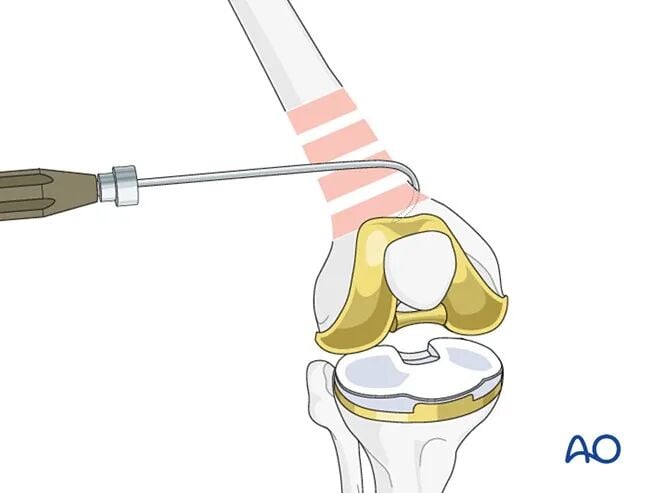
Bone hook
Directly engage the fragment to achieve anatomic reduction; insert gently and adjust slowly to minimize soft-tissue damage and avoid injury to the femoral artery.
Coaxial reduction forceps
Depending on fracture pattern, coaxial forceps can be used to reduce the distal femur.
Steinmann pins
Single or multiple Steinmann pins can directly control the displaced main fragment, providing better reduction control than extracorporeal traction.
Pins must be placed on the medial or lateral side of the femur, without obstructing the intramedullary nail insertion path.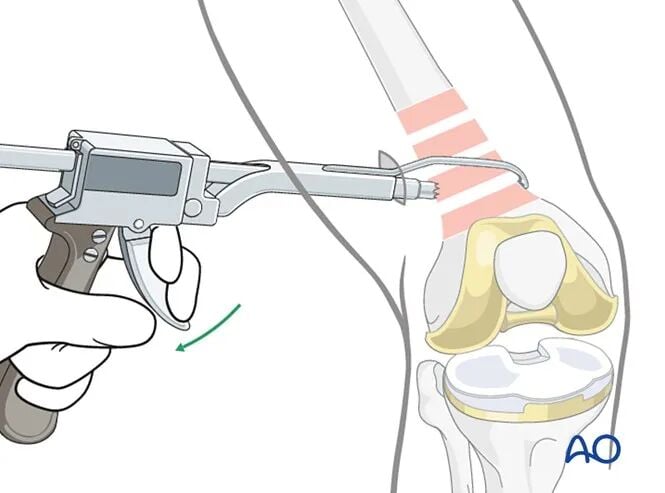
Verification of reduction
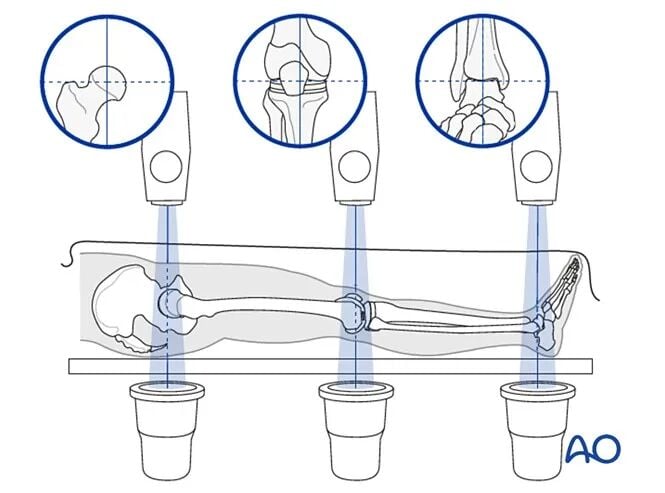
Restoration of the lower limb mechanical axis is essential. The normal mechanical axis runs from the center of the femoral head → center of the proximal tibia → center of the ankle joint. Intraoperatively, an electrocautery cord can serve as a reference: run it from the anterior superior iliac spine, through the midpoint of the patella, to the interval between the first and second toes.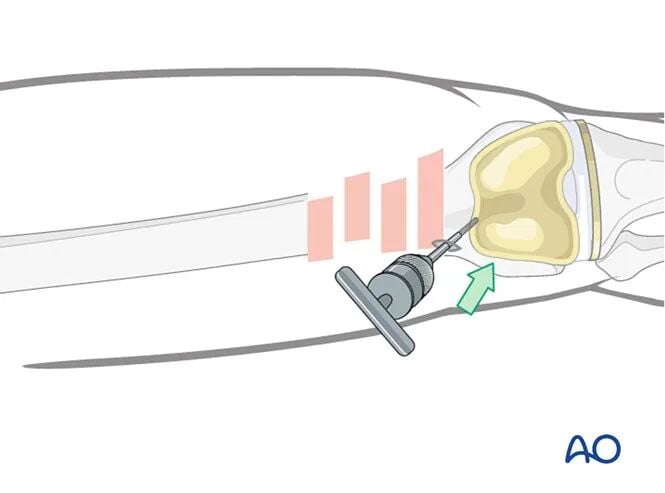
⚠️ Note: During retrograde nailing, the knee is flexed, so this axis measurement cannot be used; remove the locking targeting guide and extend the knee before performing this check.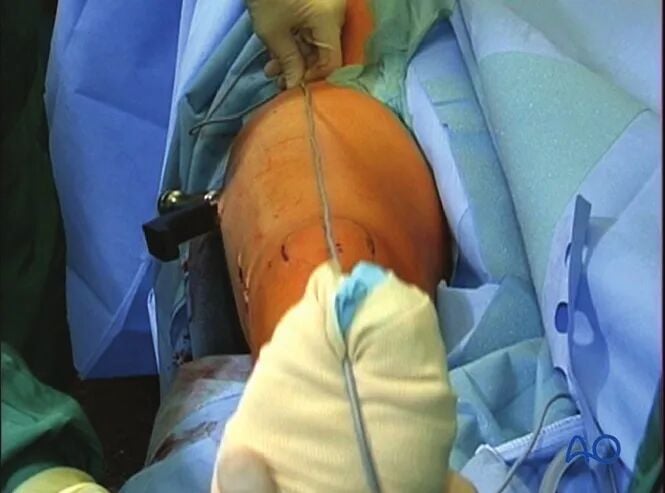
When rotational alignment is normal, the cord should pass through the midline of the patella and slightly medial to the tibial intercondylar eminence. With normal femoral mechanical alignment, the centers of the femoral head, knee, and ankle are collinear.
For simple fractures, comparison of cortical thickness between proximal and distal fragments can also help assess rotational reduction.
Intraoperatively, not only restore the mechanical axis but also strictly ensure no rotational malalignment between the proximal and distal fragments.
Blocking screws (Poller screws)
Principle: Oblique and metaphyseal fractures tend to displace, causing axis deviation. Blocking screws guide the intramedullary nail trajectory to counteract this displacement tendency.
Screw placement must anticipate the direction of fracture displacement, typically on the short side of the distal fragment. In a wide medullary canal, one screw can be placed on each side of the nail path. Placement requires high precision: the screw must limit abnormal deviation during reaming while not obstructing reaming or nail insertion.
It is recommended to insert blocking screws before reaming. For non-reamed nails, they must be placed before nail insertion to ensure close contact between screw and nail. If blocking screws are inserted after reaming, the nail path is already established and the screws lose their corrective effect.
When reaming with blocking screws in place, proceed extremely gently to avoid damaging the reamer and screws.
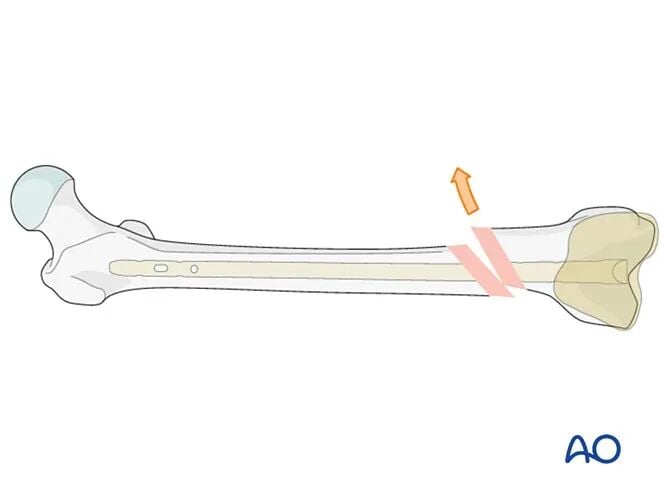
Screw position is determined by the original fracture displacement direction: if the fracture tends to displace medially, the blocking screw should be placed lateral to the intended nail path.
In a wide canal, place blocking screws on both sides of the nail path.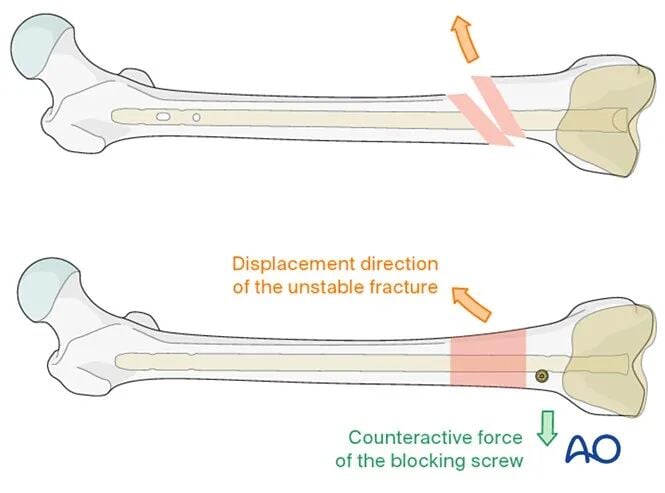
5. Implant Selection
Place the guidewire into the pre-drilled entry point, and under fluoroscopic guidance advance it into the proximal femoral fragment. Retrograde guidewire passage into the proximal fragment is easier than in antegrade nailing.
Advance the guidewire to the lesser trochanter region, where bone stock provides good grip to prevent guidewire migration during instrument exchanges.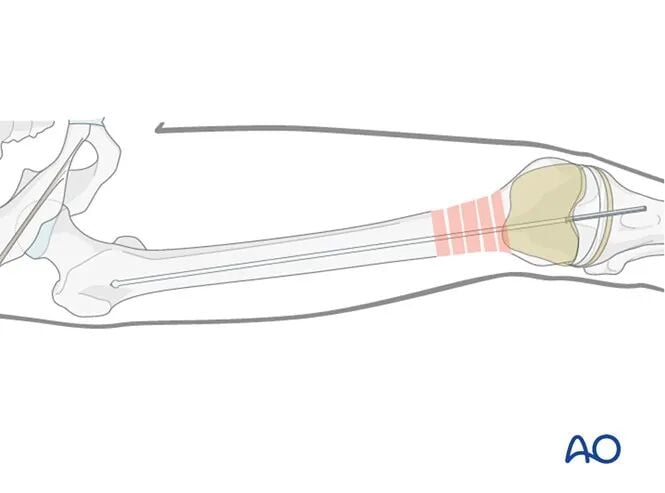
Nail length
For distal femoral fractures, the ideal retrograde nail length varies with surgeon preference. A common standard: the nail tip should end flush with the level of the lesser trochanter.
Excessive length creates stress concentration at the femoral neck; insufficient length leaves the nail in the mid-diaphysis, making proximal locking significantly more difficult.
Length measurement: compare a spare guidewire of equal length to the intraoperative guidewire; fluoroscopically confirm the position of the intraoperative guidewire in the proximal canal, and place the distal end of the spare wire against the distal femoral articular surface under fluoroscopic verification.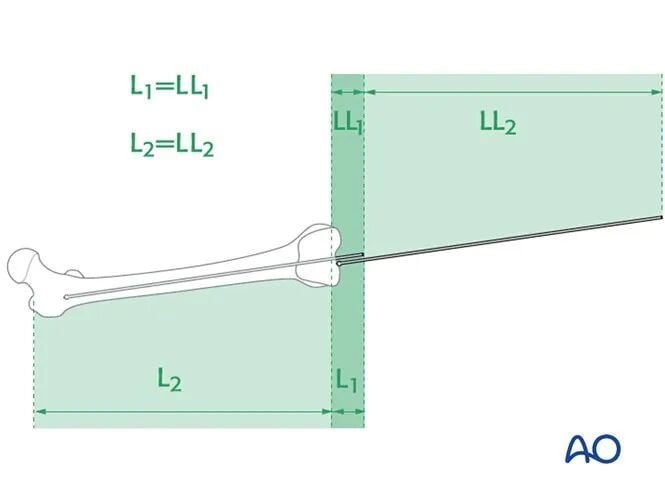
Monitor the fracture zone under fluoroscopy throughout to ensure no shortening of the original femoral length.
If the fracture is comminuted and length cannot be determined, use the contralateral limb length as a reference for nail sizing.
Placement of the measuring ruler: one end at the midpoint of the intercondylar notch roof, extending along the medullary canal axis.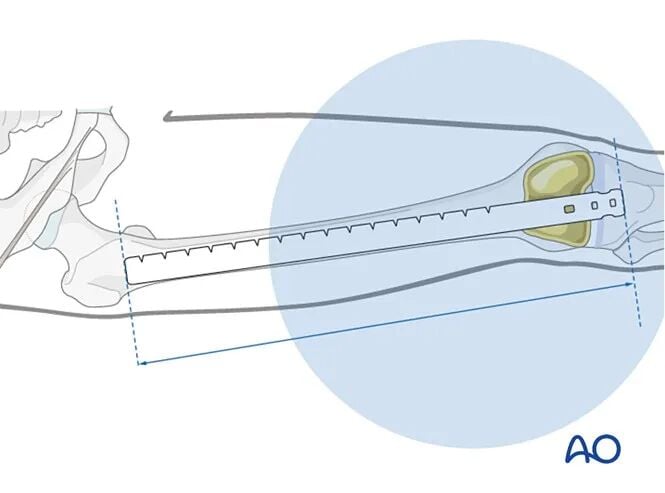
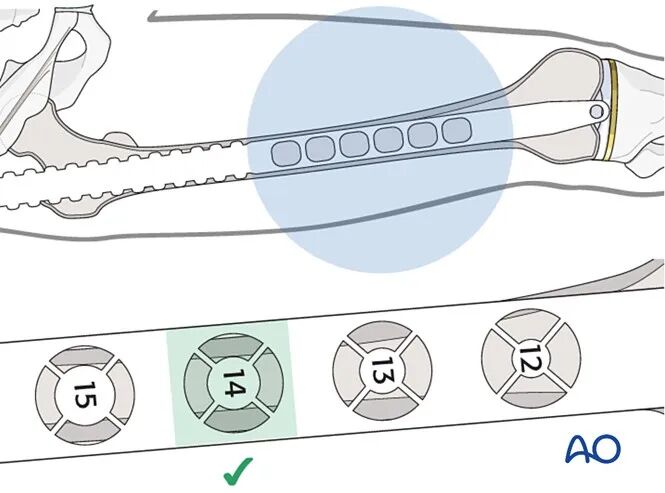
Nail diameter
Assess the intramedullary canal diameter intraoperatively via fluoroscopy, or choose a nail 1.5 mm smaller than the largest reamer used.
6. Reaming
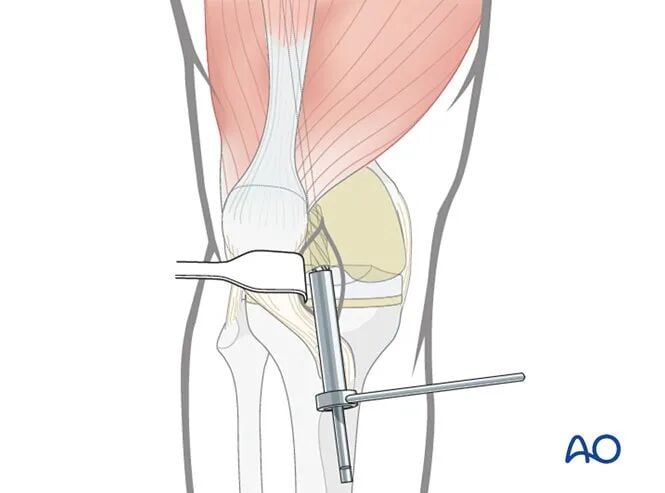
Use sequentially larger reamers.
If reaming is required, start with an end-cutting reamer, with a soft-tissue protection sleeve to avoid damage to prosthetic components.
Preoperative planning for canal preparation should include not only measurement of the femoral component opening but also assessment of the tibial polyethylene insert to prevent prosthetic damage and determine the maximum allowable nail diameter. If the tibial insert is damaged, a staged polyethylene exchange may be required.
7. Nail Insertion
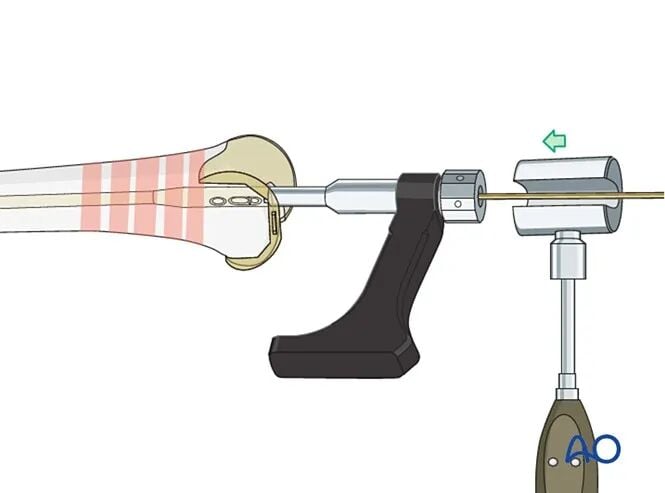
Gently push the nail into the distal fragment; in most cases, manual insertion is possible. If necessary, light tapping with a mallet may assist advancement until the nail fully passes the proximal aspect of the femoral stem.
In osteoporotic, oblique, or comminuted distal femoral fractures, proceed cautiously to avoid excessive impaction that could cause femoral shortening.
8. Distal Interlocking Stabilization
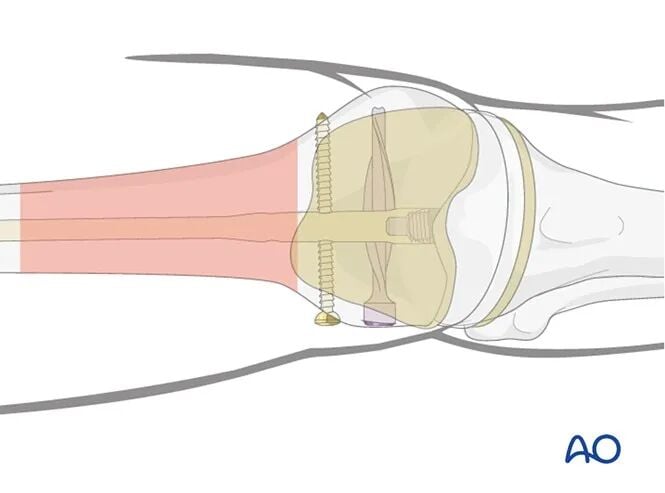
The distal femoral medullary canal is usually much wider than the nail diameter; stable distal locking is mandatory.
Options include:
- Multiplanar locking screws
- Angular-stable locking systems
- Helical blades (with end caps for angular-stable fixation)
- Secondary placement of blocking screws
9. Intraoperative Radiographic Assessment of Rotational Alignment
⚠️ Note: During retrograde nailing, the knee is flexed, so the axis cord measurement cannot be used; remove the locking targeting guide and extend the knee before performing this check. This step is done before the end of the procedure; if a deformity is identified, it can still be corrected immediately.
With both patellae facing forward, compare the bilateral lesser trochanter morphology on fluoroscopy (the "lesser trochanter shape sign") to assess rotational alignment.
Preoperatively, store a fluoroscopic image of the contralateral lower limb (with patella facing forward) showing the lesser trochanter as a reference. The accompanying image shows a normal contralateral lesser trochanter profile.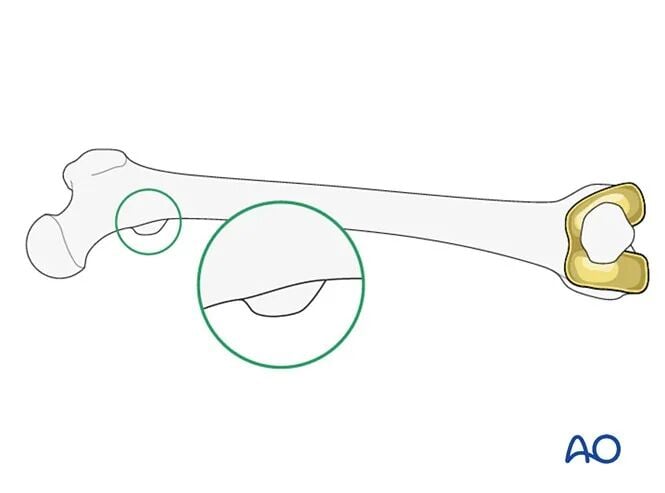
⚠️ Rotational malalignment diagnosis
If the fluoroscopic profile of the lesser trochanter on the affected side differs from the contralateral side, rotational malalignment is present.
Ensure that both patellae are facing directly forward during assessment.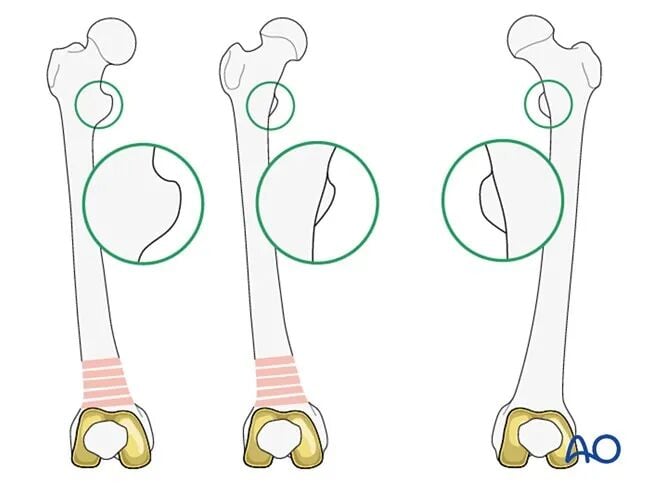
Correction of rotational deformity (matching lesser trochanter profile)
After distal locking is completed, use the nail insertion handle to rotate the distal fragment and adjust rotational alignment with the proximal fragment until the lesser trochanter profiles match bilaterally.
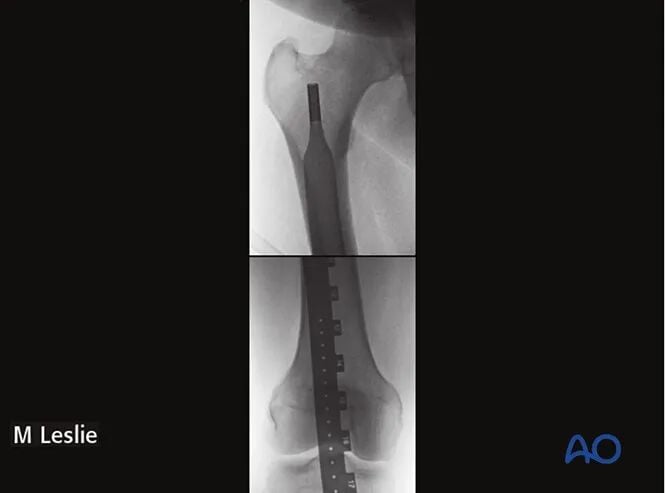
10. Proximal Locking
General points
The first proximal locking screw is placed in the AP plane; the operating table must be radiolucent.
Preoperative planning must ensure that clear true AP and lateral fluoroscopic views of the proximal femur can be obtained intraoperatively. Thick subcutaneous fat (obese patients) significantly increases difficulty.
Long retrograde femoral nails make it challenging to insert lateral proximal locking screws from outside-in because fluoroscopic equipment cannot easily be positioned around the proximal femur.
Drilling for locking screws
For proximal femoral AP locking, a freehand technique is used; this is easier after removing the distal locking targeting guide and placing the lower limb flat on the table.
Adjust the fluoroscope to a true AP view, perpendicular to the nail. The proximal static locking hole should project as a perfect circle. Use the tip of a scalpel to mark the entry point at the center of the circular hole. Make a 3–4 cm skin incision and bluntly dissect the muscle layers.
Under fluoroscopy, center the drill tip over the locking hole. Periodically disengage the drill to confirm its position under fluoroscopy and repeatedly correct as needed.
⚠️ Tip: During drilling, an assistant must stabilize the limb to prevent movement that would deviate from the hole, while also avoiding rotational malalignment.
✅ Technique: If available, a radiolucent angled drill can be used, employing the same technique as for distal locking in antegrade femoral nailing.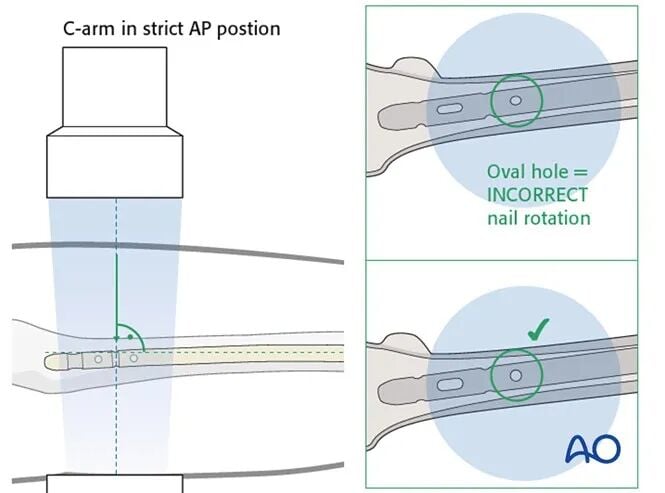
Inserting the locking screw
Measure screw length with a depth gauge and insert the AP locking screw.
Avoid oblique screw insertion to prevent the screw from jamming between the dense proximal femoral cortex and the nail.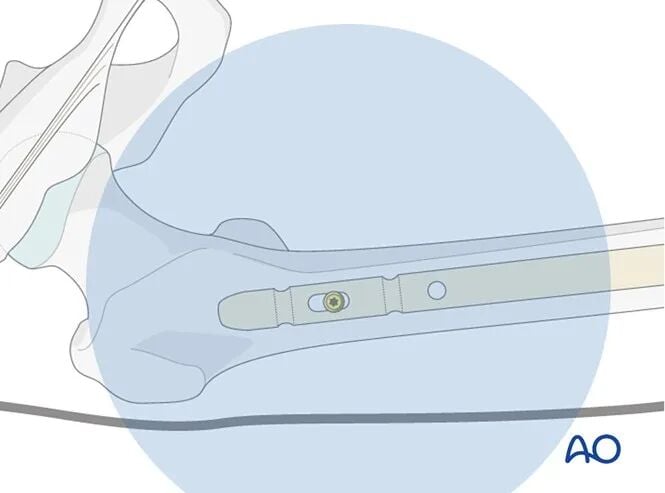
Second proximal locking screw
Depending on fracture morphology, choose to insert one or two proximal locking screws; in osteoporotic cases, two screws are routinely recommended for added stability.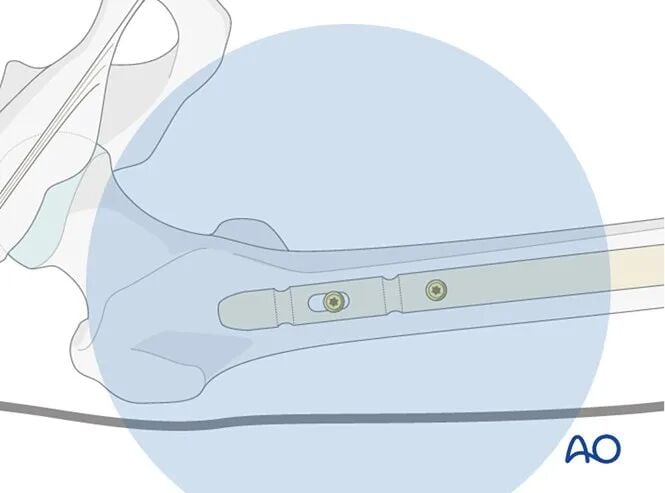
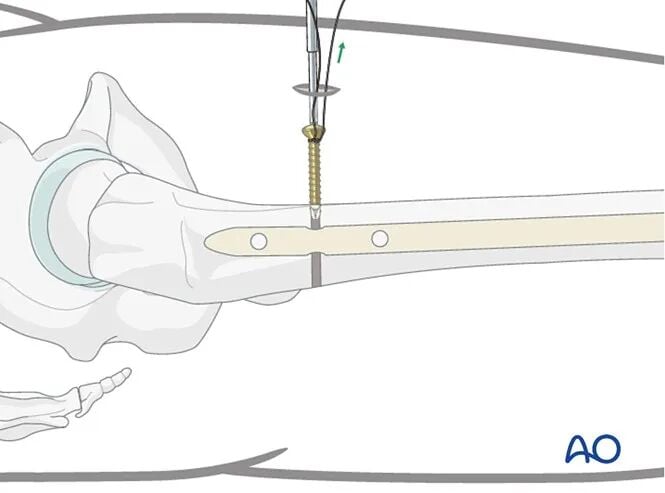
✅ Technique: If the screwdriver slips off the screw head, the screw may become lost in the soft tissues and be difficult to retrieve.
Tie a heavy absorbable suture around the screw head to prevent this time‑consuming complication.
11. Assessment of Alignment and Knee Stability
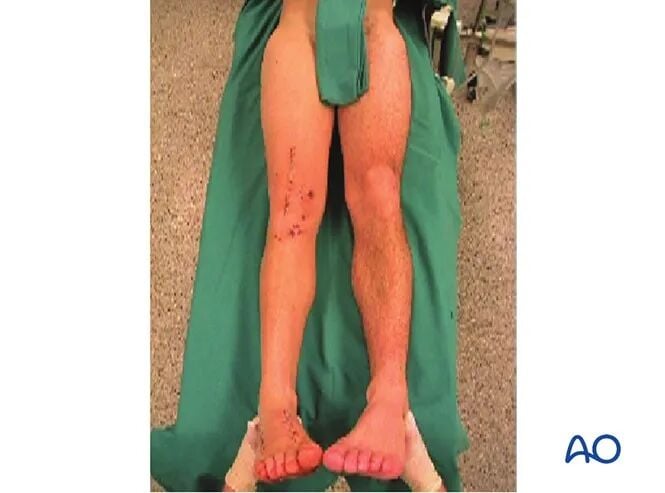
Before transferring the patient off the table, clinically compare bilateral lower limb rotational alignment.
✅ Technique: After femoral fixation, gently perform a thorough knee examination to rule out associated ligamentous laxity or injury.
12. Postoperative Management
Intramedullary nailing provides stable fixation, allowing early full weight-bearing.
A knee brace is not mandatory; it may be used selectively for patient comfort.
Source: AO Surgery Reference