
Transarticular External Fixation for Distal Radius Fractures
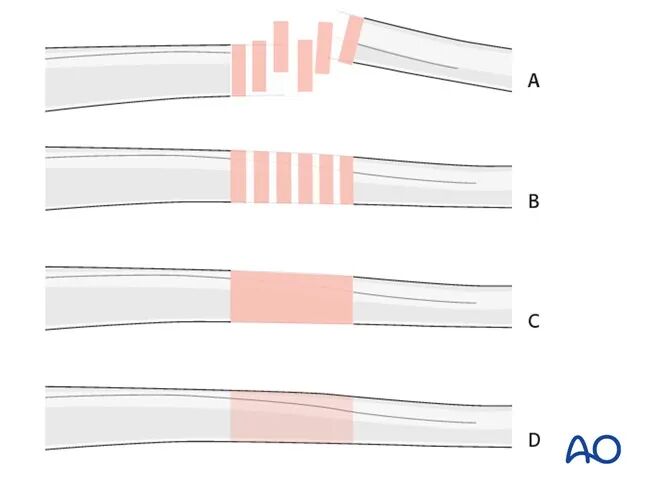
This treatment protocol illustrates four common fracture types as follows:
- A) Unreduced fracture
- B) Reduced fracture
- C) Reduced and temporarily fixed fracture
- D) Finally fixed fracture
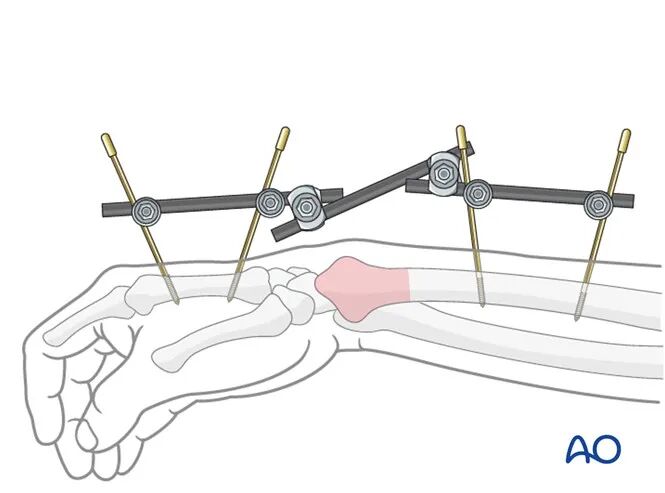
Principles of Transarticular External Fixator Application
In simple or complex fractures of the distal forearm, a transarticular external fixator of the wrist can be used as a temporary or definitive treatment.
The external fixator can be used alone or as an adjunct to K-wire fixation. The specific technique for K-wire fixation for each applicable fracture type is described in a separate protocol.
Special considerations for wrist external fixation: For transarticular external fixation of the wrist, a 4 mm (small) external fixator system is typically used, but it can also be combined with an 8 mm (medium) system. Its application follows the basic technique described for the 11 mm (large) external fixator system.
Various other external fixator systems are available.
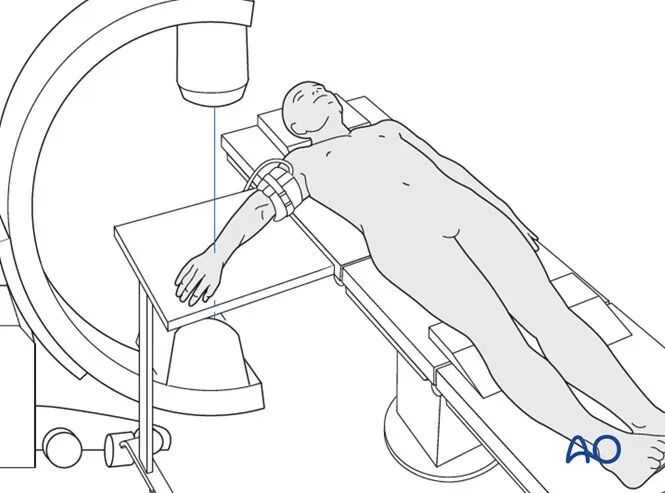
Patient Preparation
For the dorsal approach, the patient is placed in the supine position.
Pin Insertion (Wrist)
Complications Related to Pin Insertion
When inserting threaded pins for an external fixator, the following three potential complications should be considered:
- Injury to the extensor tendons
- Injury to the superficial branch of the radial nerve
- Metacarpal fracture
The risk of these complications can be reduced by the following preventive measures:
- Familiarity with the anatomy and specific anatomical landmarks for pin insertion
- Using a larger surgical incision (1 cm for the second metacarpal, longer for the radius) rather than a small incision
- Blunt dissection down to bone
- Pre-drilling before pin insertion

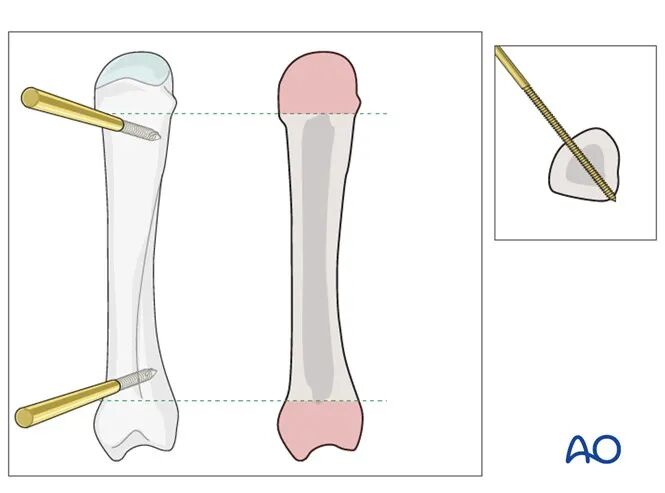
Anatomical Landmarks for Second Metacarpal Pin Insertion
- The distal pins should be inserted proximal to the transition between the metacarpal head and the metacarpal shaft.
- The proximal pins should be inserted distal to the transition between the metacarpal shaft and the metacarpal base.
- Pins should be securely fixed in both cortices.
Pitfall: Eccentric Pin Placement
Eccentric pin placement may weaken the metacarpal and lead to metacarpal fracture.
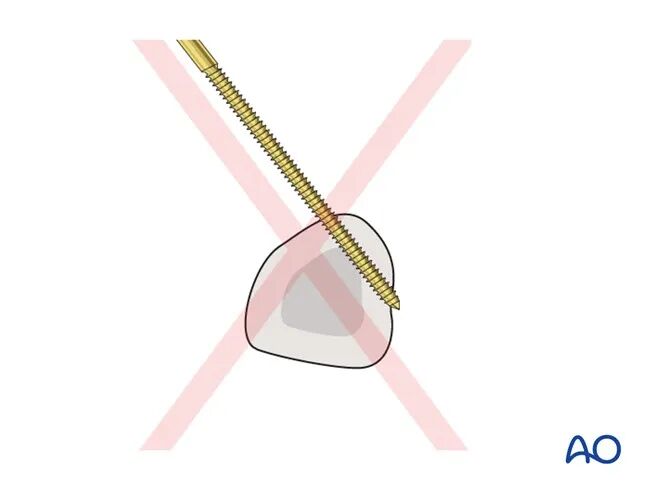
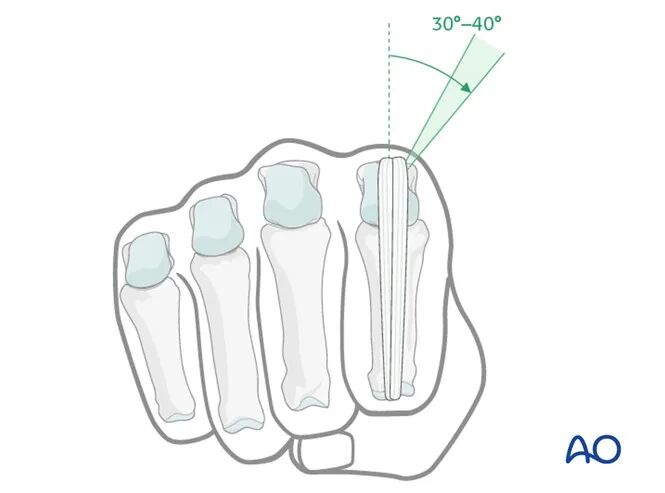
The distal metacarpal screw must not penetrate the extensor hood.
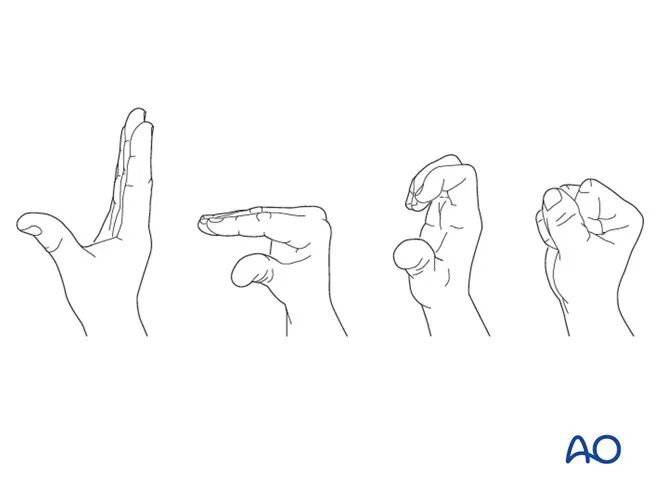
To avoid this complication, passively flex the index finger MCP joint to 90°, allowing the extensor hood to move slightly distally, and retract the tendon ulnarly.
In the coronal plane, the pin should be placed at an angle of 30°–40° from the sagittal plane to avoid penetrating the extensor tendon or extensor hood.
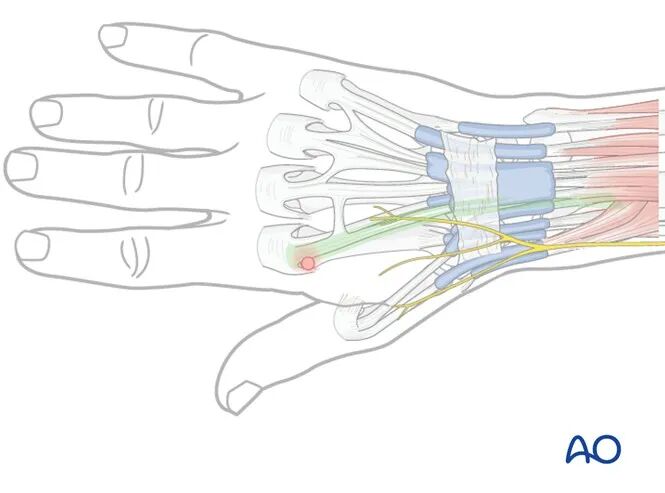
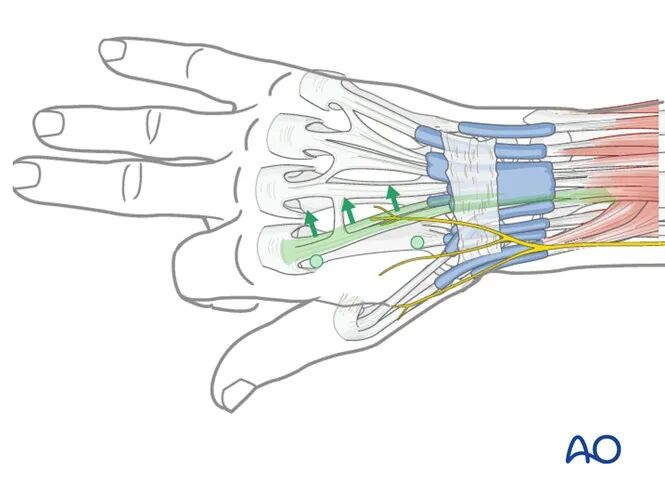
Anatomical Landmarks for Radial Shaft Pin Insertion
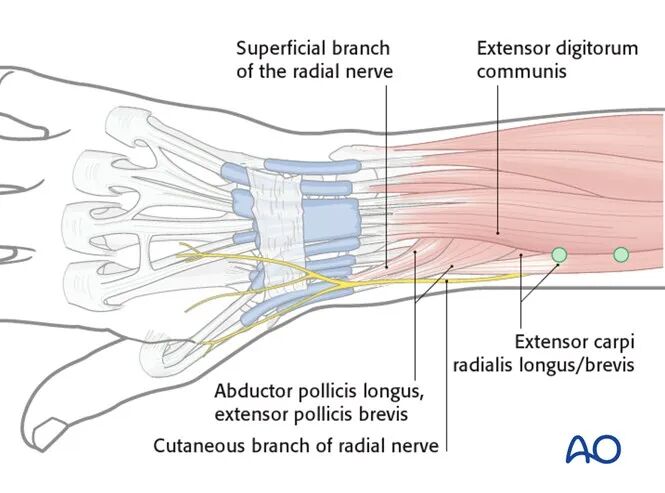
The two proximal pins should be inserted proximal to the bellies of the abductor pollicis longus (APL) and extensor pollicis brevis (EPB) and should not penetrate these muscles.
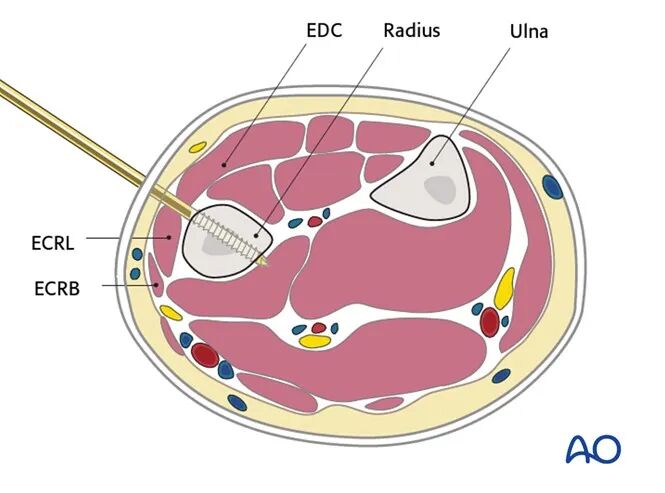
These muscles are usually easy to identify. Approximately 3–4 cm proximal to them, the radial shaft can be palpated through the skin. This region, between the extensor digitorum communis (EDC) and the extensor carpi radialis longus/brevis (ECRL/ECRB) bellies, is the preferred area for proximal radial pin insertion.
The pin should be inserted perpendicular to the cross-section of the radial shaft.
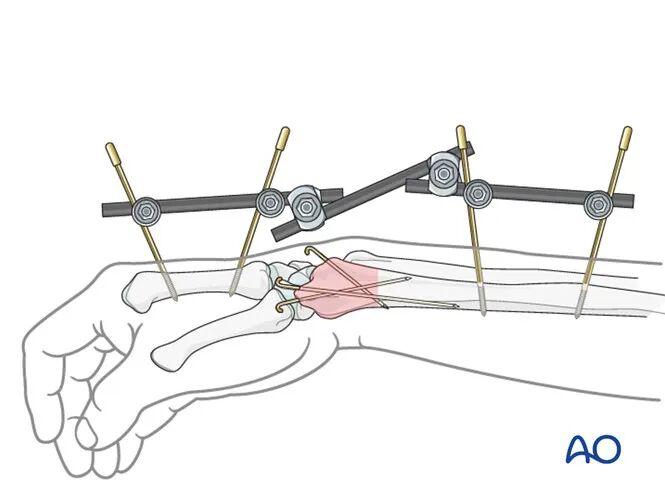
Frame Construction / Reduction and Fixation (Wrist)
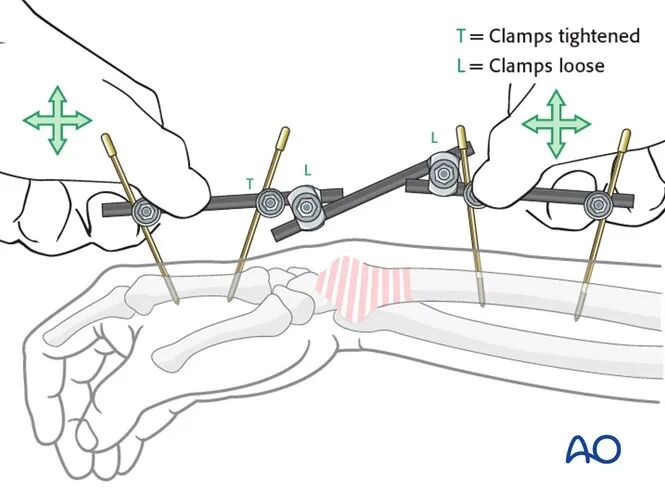
Reduction and Fixation
Fracture reduction is achieved by applying longitudinal traction via the thumb, index finger, or the distal part of the frame. Depending on the fracture type, additional maneuvers may be necessary. Applying pressure to the dorsal aspect of the carpus may help restore the palmar tilt of the distal radial articular surface.
Auxiliary K-wires
If the external fixator is used as definitive treatment, additional K-wires may be inserted percutaneously for comminuted fractures.
Detailed K-wire insertion technique is described in the treatment protocol for the corresponding fracture type.
Postoperative Care Following External Fixation
Pin Site Care
Proper pin insertion technique is more important than any specific pin site care protocol for preventing postoperative complications. Key points include:
- Correct pin placement (according to safe zones) avoiding ligaments and tendons (e.g., tibialis anterior)
- Correct pin insertion technique (e.g., angle, depth) to avoid thermal necrosis
- Enlarging skin incisions to relieve soft tissue tension around the pin insertion site (see inspection and management of skin incisions)
Pin Site Care
Experts worldwide have developed various postoperative care protocols to prevent pin site infections. Therefore, this document does not mandate a uniform standard. However, the following principles are recommended:
- Adhere to the same protocol consistently until the external fixator is removed.
- Keep the pin sites clean by removing crusts and exudates. Clean the pins with normal saline and/or antiseptic/alcohol as needed, with frequency adjusted based on the situation (ranging from once daily to once weekly), but avoid over-cleaning.
- Routine use of ointments or antibiotic solutions for pin site care is not recommended.
- Once the wound has stopped oozing, dressings are usually not required.
- No pin site protection is needed when showering or bathing with clean water.
- Instruct the patient or caregiver on how to perform the cleaning procedure.
Loose Pin or Pin Site Infection
If a pin becomes loose or a pin site infection occurs, the following measures should be taken:
- Remove all affected pins and insert new pins into healthy bone.
- Debride the pin tract in the operating room, including curettage and irrigation.
- Obtain specimens for microbiological examination to guide appropriate antibiotic use if necessary.
- Ensure the infected pin tract has healed before converting to definitive internal fixation; otherwise, infection may be introduced.
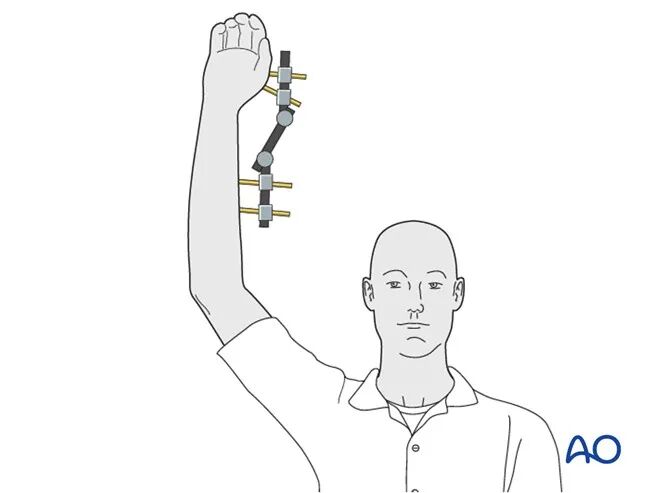
Functional Rehabilitation
Postoperatively, the patient should be encouraged to elevate the affected limb and mobilize the fingers, elbow, and shoulder joints.
If needed, functional rehabilitation can be guided by a hand therapist.
Follow-up
A follow-up visit is required 7–10 days postoperatively to inspect the wound and assess fracture reduction with X‑rays.
Implant Removal
If the external fixator is used as definitive treatment, it is typically retained for 6 weeks before removal (K-wires, if used, are removed at the same time).
The timing of removal may be influenced by several factors, including the specific fracture pattern, individual patient characteristics, and radiographic evidence of fracture healing.