EN
EN


Pedicle Screw Placement Techniques for the Cervical, Thoracic, and Lumbar Spine
Pedicle screw instrumentation is a fundamental surgical skill in spinal surgery and is one of the essential techniques that young surgeons must master. Given the unique anatomical features of the thoracolumbar pedicles and the complexity of their adjacent structures, a thorough understanding of the relevant procedural details and technical nuances is critical.
(I) Thoracic Spine
Pedicle screw placement is a basic skill in spinal surgery. For the thoracic spine, the cephalad–caudad entry point is generally chosen at the junction of the upper and middle one‑third of the transverse process, or at the upper border of the transverse process. The medial–lateral entry point is usually at the lateral border of the facet joint.
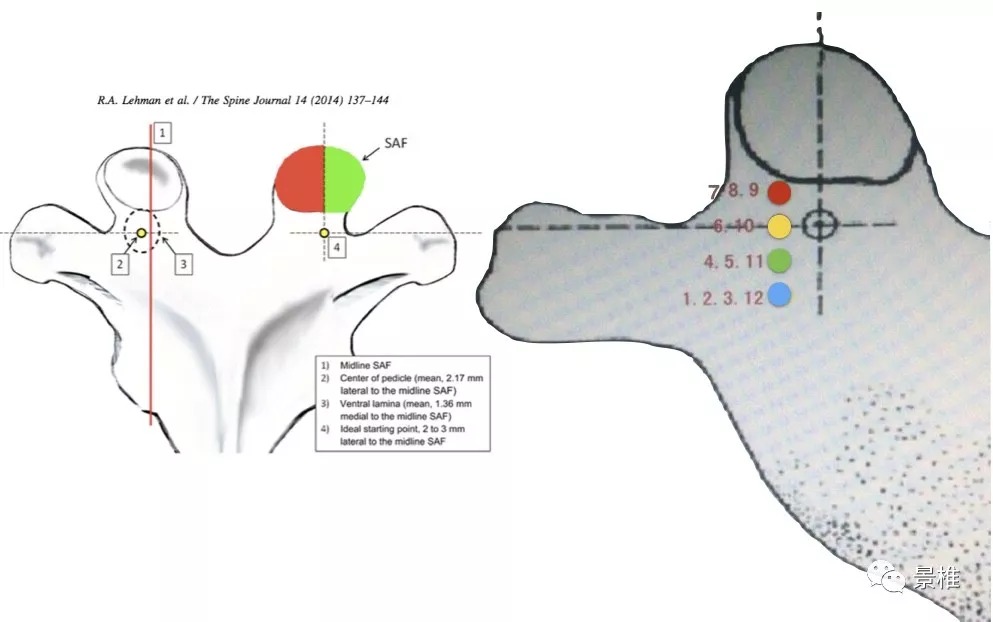
The article introduces a new method for determining the medial–lateral entry point, termed the “ventral lamina and superior articular facet method.” Specifically, the medial–lateral entry point is selected 2–3 mm lateral to the midline of the superior articular facet (SAF) of the thoracic vertebra. However, because of anatomical variations, this localization method carries a 0.43% risk of entering the spinal canal.
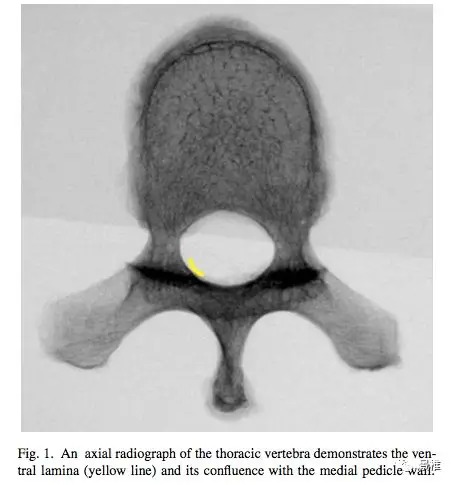
The ventral cortex of the thoracic lamina is relatively thick and strong; as a result, the pedicle probe tends to be guided naturally into the pedicle, creating a well‑positioned screw track.
The article mentions the cephalad–caudad entry point method proposed by Lenke et al. in 2004 (which the author has found to be very reliable in practice):
- T7, T8, T9: at the junction of the upper border of the transverse process and the facet joint.
- T1, T2, T3, T12: at the midpoint of the transverse process (for T12, choose the midpoint of the saddle‑shaped depression).
- T6, T10: slightly above the upper‑middle one‑third of the transverse process.
- T4, T5, T11: at the upper‑middle one‑third of the transverse process (on the transverse process ridge; T11 sometimes also has a saddle‑shaped structure).
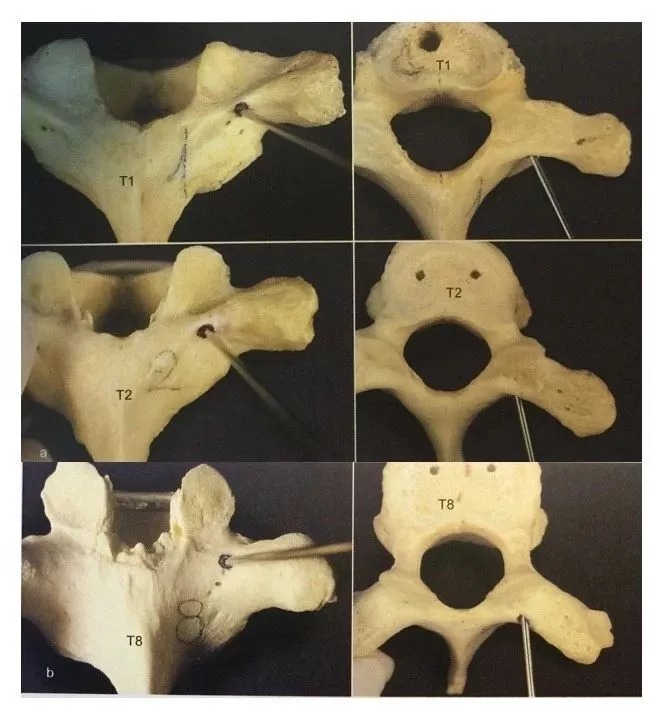
The author’s commonly used method for the cephalad–caudad entry point is: for T7, T8, and T9, choose the upper border of the transverse process; for all other levels, choose the transverse process ridge. For T11 and T12, if a saddle structure is present, the entry point is directly at the depression of the saddle.
(II) Cervical Spine
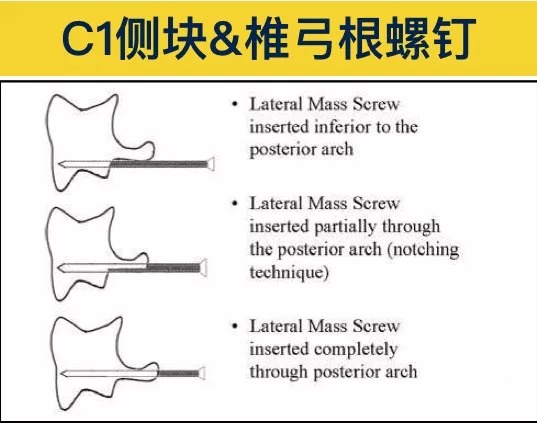
For the atlas (C1), there are three conventional methods, which are essentially similar in their medial–lateral entry point. The cephalad–caudad entry point varies by technique, but most of the screw trajectory lies within the lateral mass, with some trajectories either cutting across the posterior arch or lying entirely within it.
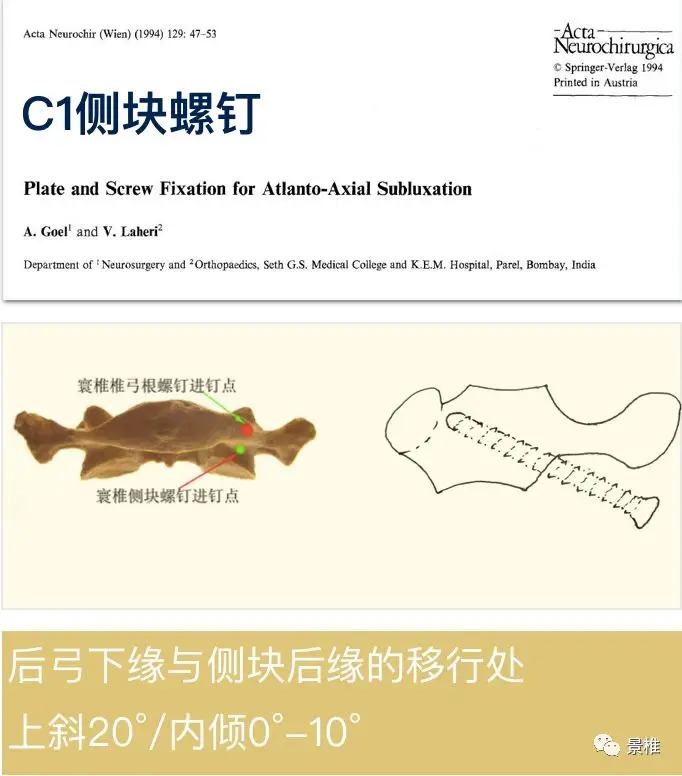
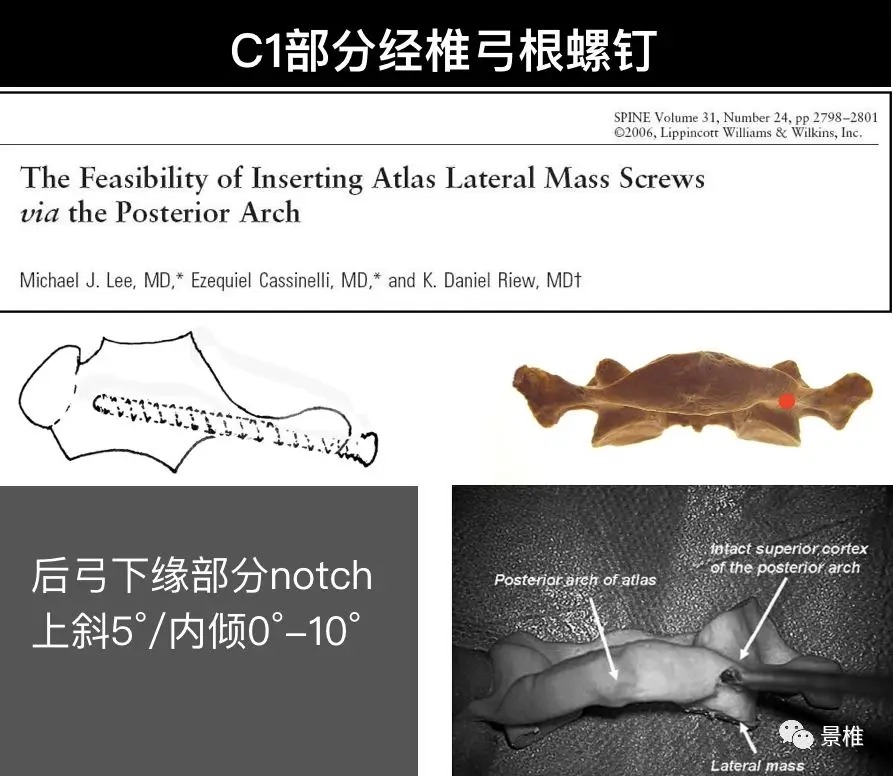
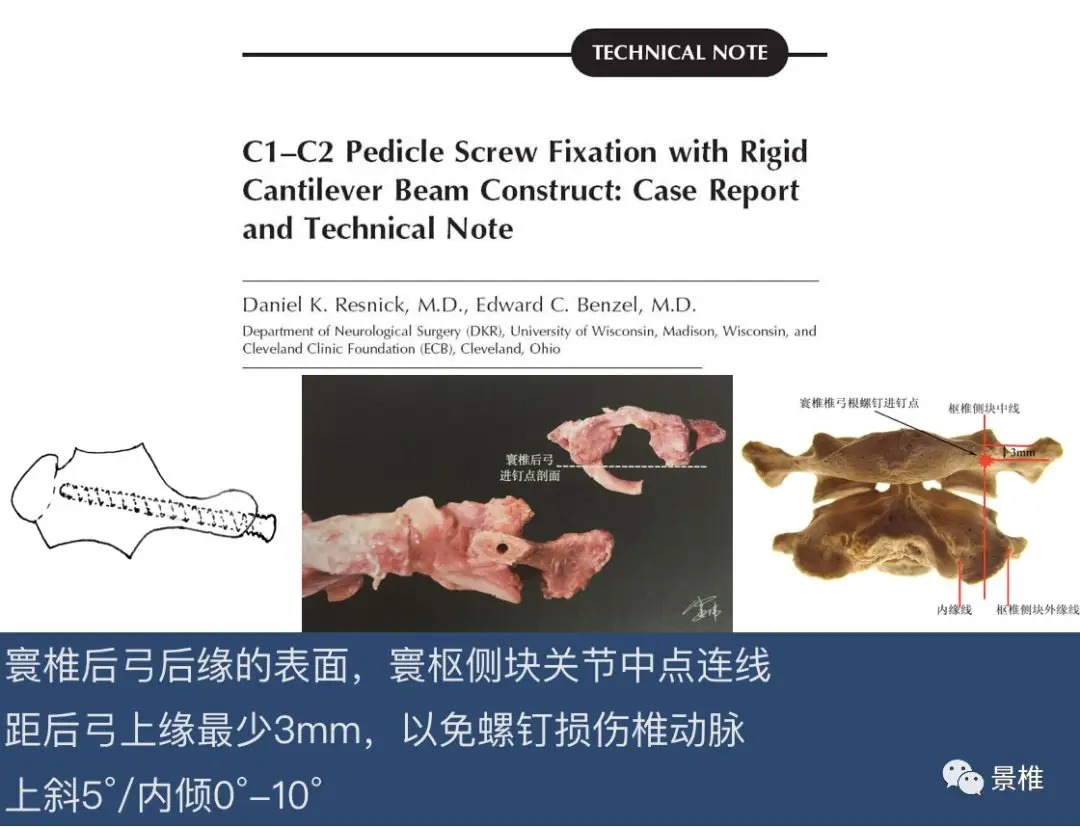
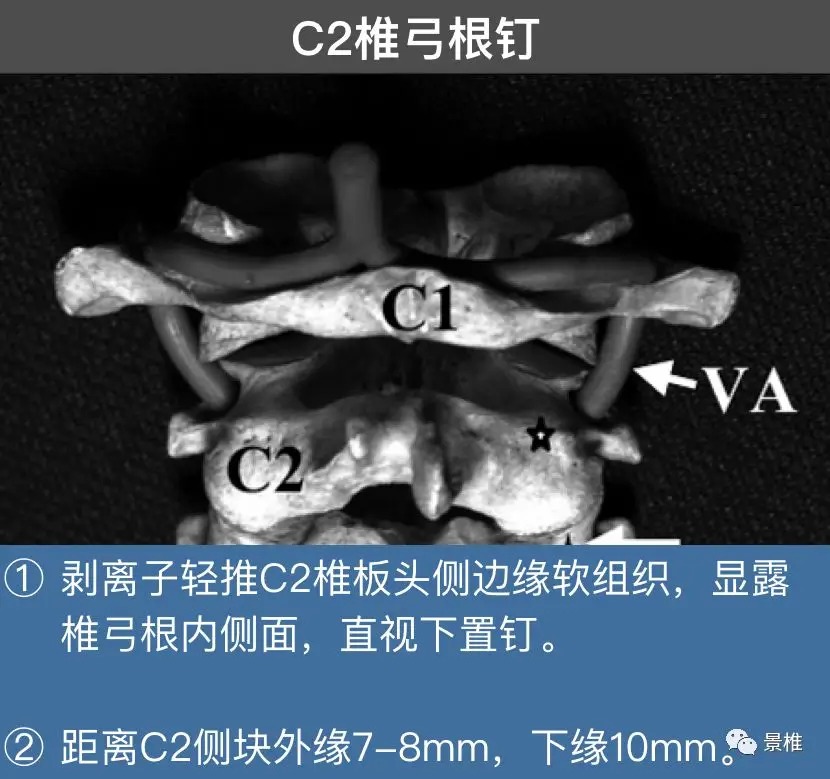
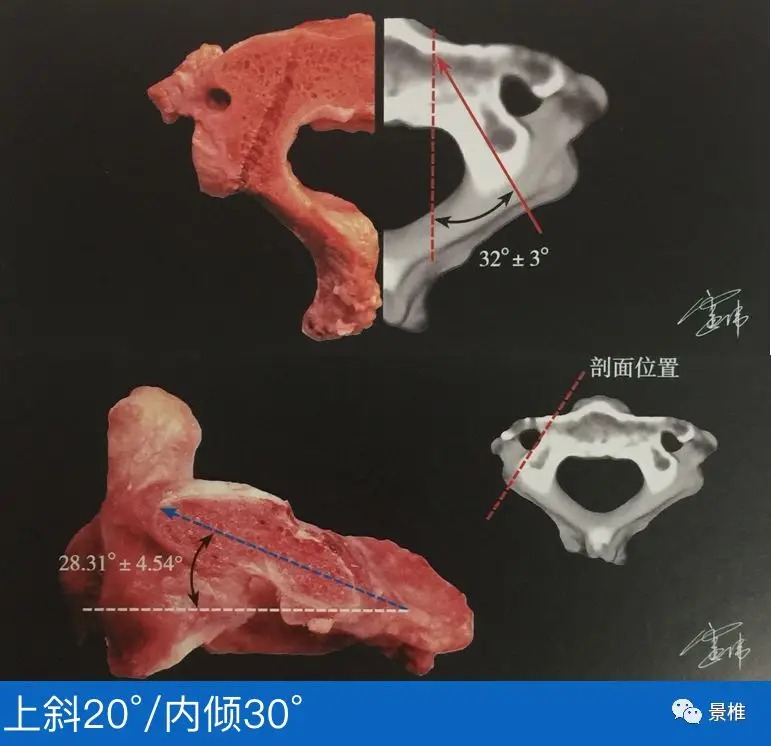
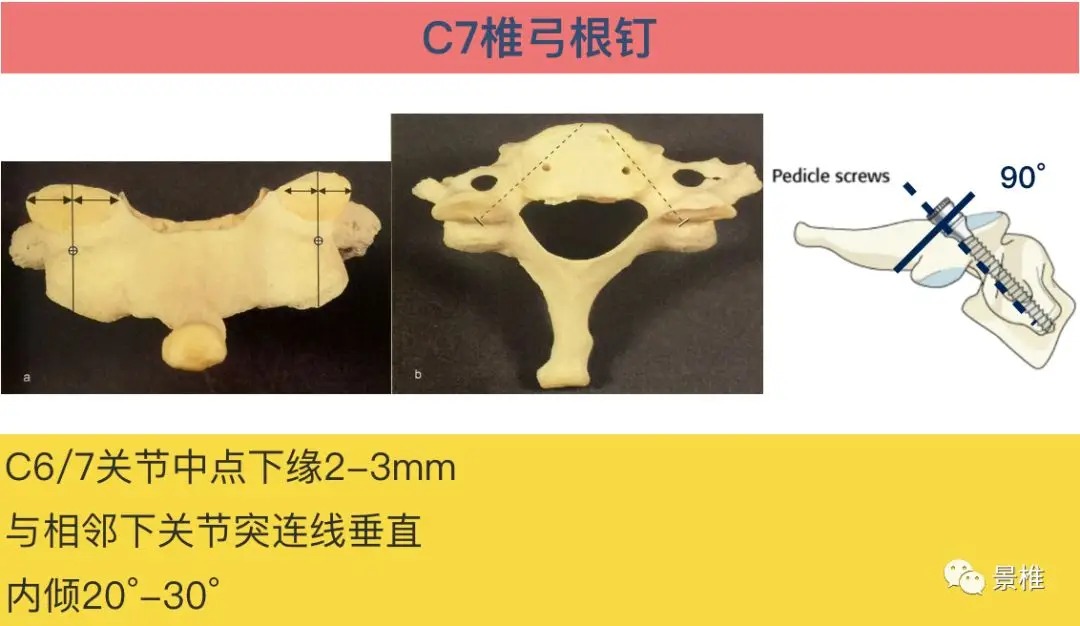
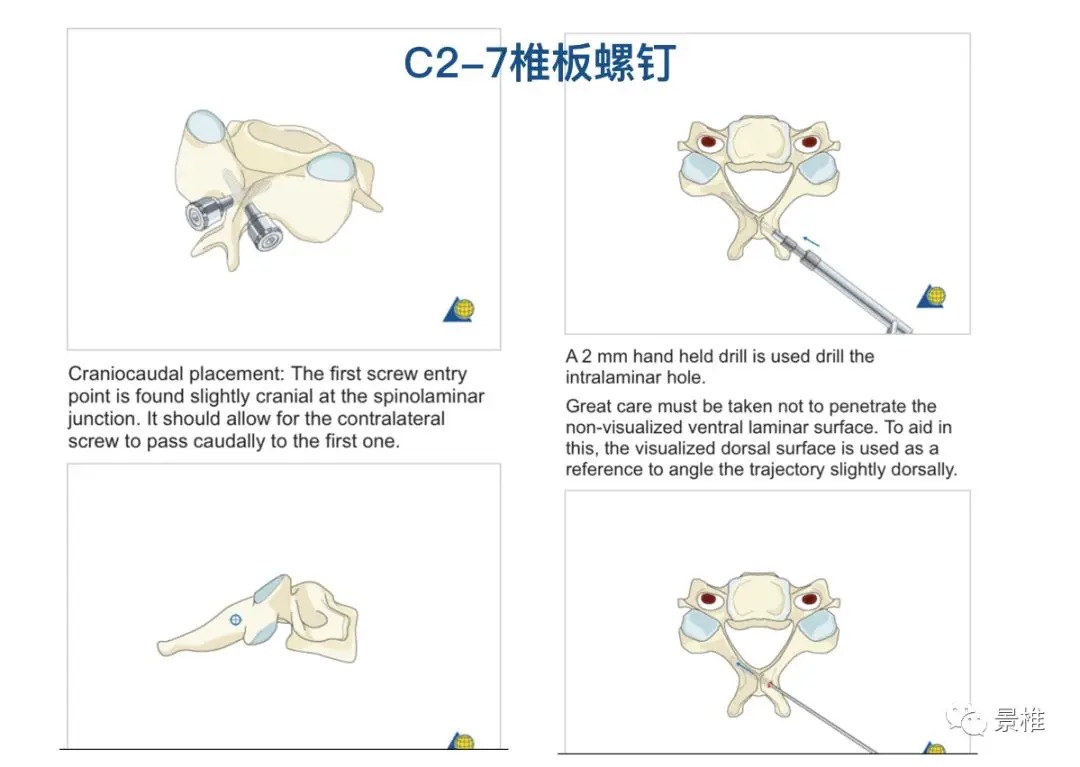
For C2 pedicle screw placement, exposing the medial border of the pedicle and placing the screw under direct visualization is the safest and most reliable approach. Pedicle screw techniques for C3–C6 are more difficult to master and are heavily dependent on individual anatomical variations.
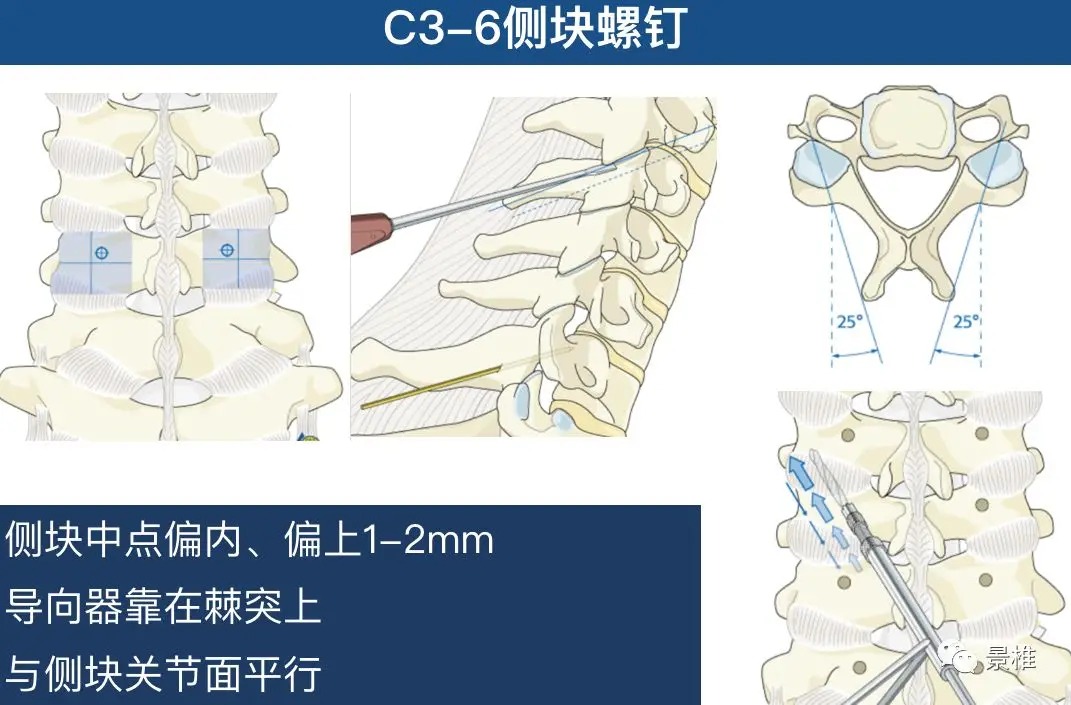
For lateral mass screws, the entry point can be at the midpoint of the lateral mass, slightly medial, or 1 mm superior or inferior to the midpoint. The entry point is not a single spot but rather a safe zone.
(III) Lumbar Spine
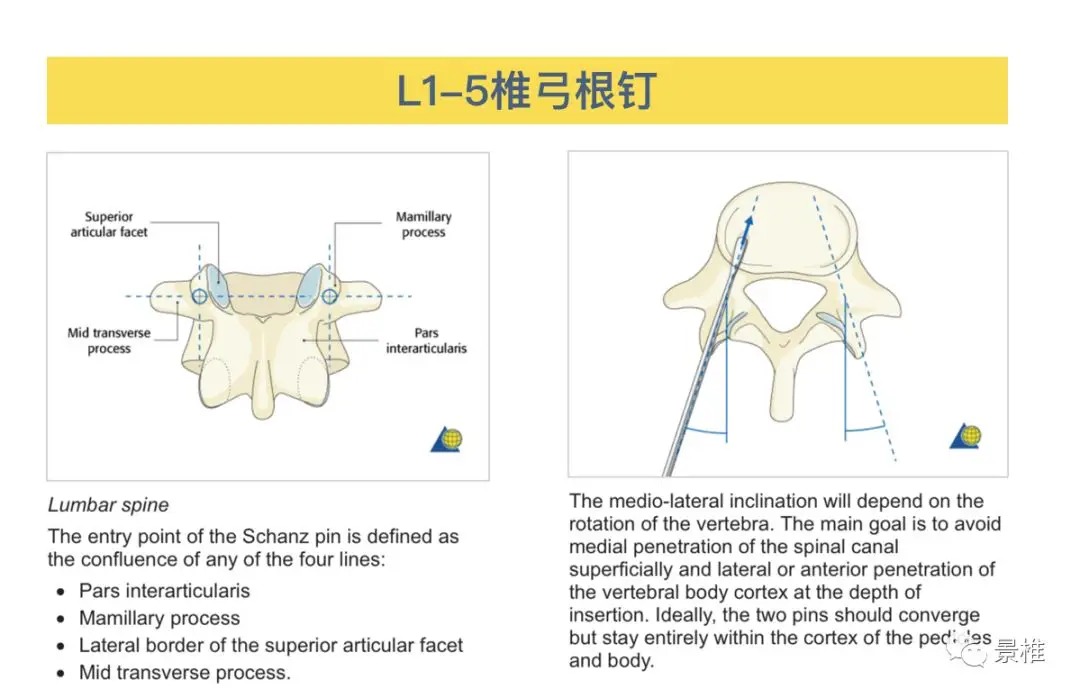
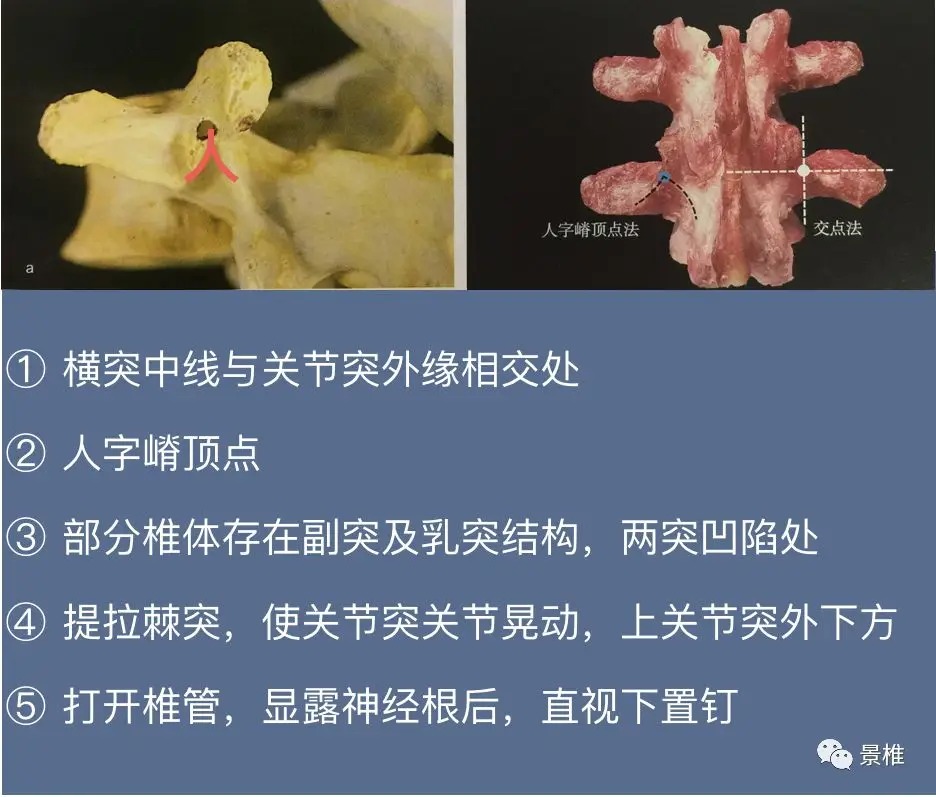
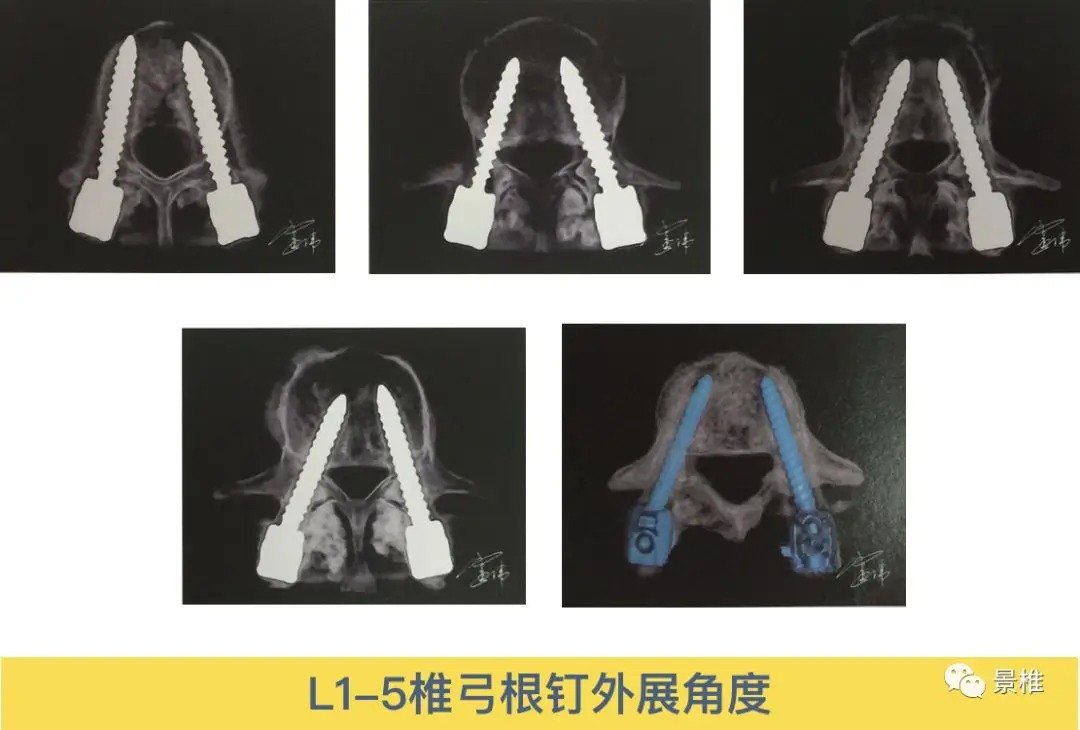
The lateral angulation for lumbar pedicle screws is approximately 20°–30°. In practice, these numerical values are difficult to precisely follow; they require long‑term practice, and having a general sense of the angle is sufficient.
Tactile feedback is very important. When advancing through the cancellous bone of the pedicle, one can feel a gritty, sand‑like sensation. There is also a feeling of “suction” or the probe being “gripped” by the bone. A helpful analogy: take a handful of sand or millet in your hand and insert a metal rod between your fingers—that is the sensation.
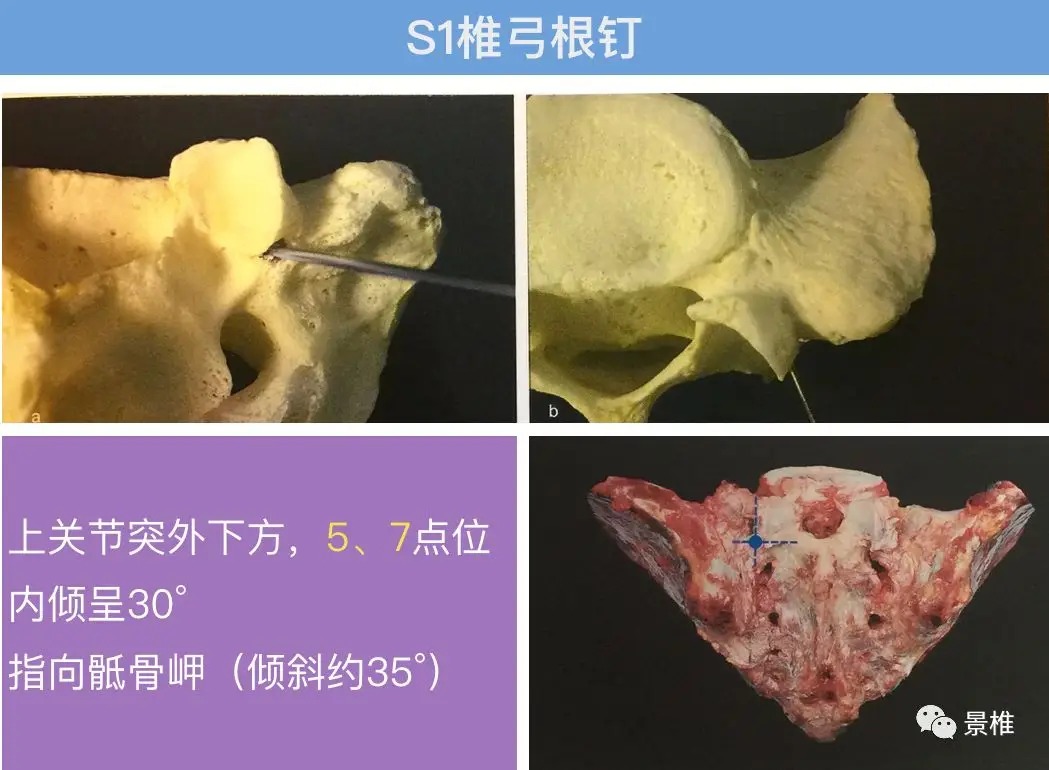
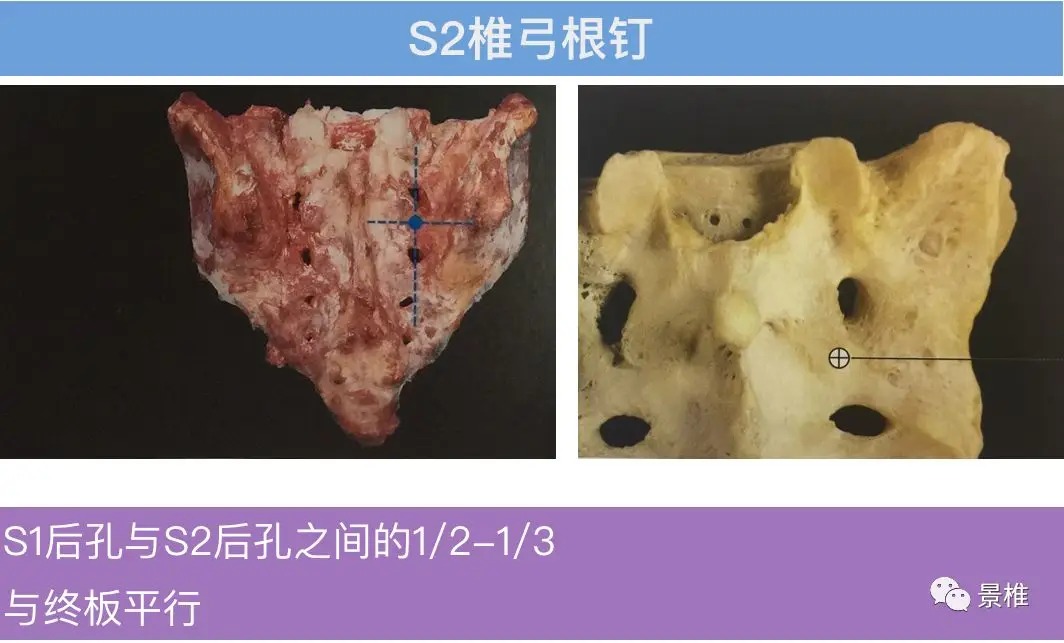
Some of the images are adapted from Professor Lei Wei’s book, “Atlas of Spinal Internal Fixation Systems.”