

AO Standard Technique: Buttress Plate Fixation for Medial Malleolus Fractures
1. Principle
As the screw threads engage the main body of the tibia, the screw head compresses the medial fracture fragment against the tibia.
The smooth shank of the screw does not gain purchase within the bone.
The screw shank length must be chosen so that the threads completely cross the fracture line.
The buttress plate functions to neutralize vertical shear forces.
2. Patient Preparation and Surgical Approach
The patient can be positioned as follows:
* Supine position
* Supine "Figure-Four" position
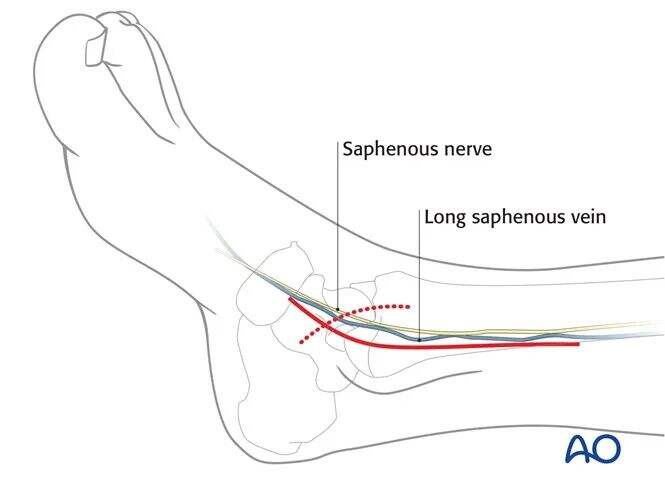
A medial approach is routinely used for this procedure.
3. Reduction
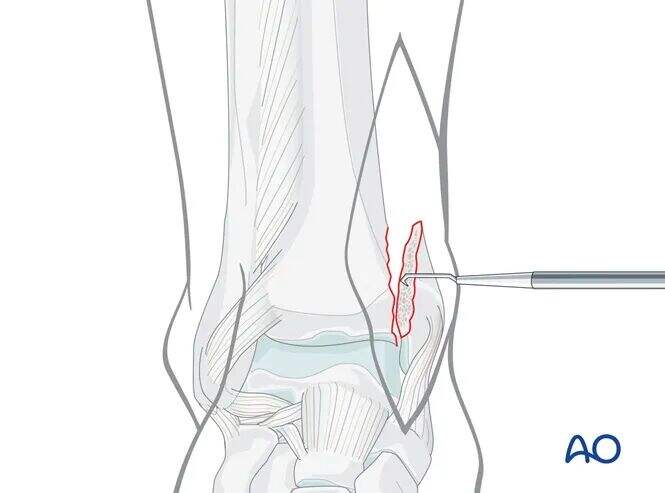
Debridement of the Fracture Site
The joint must be visualized and inspected. Remove any bone or cartilage fragments originating from the medial malleolus or talus, as well as any impacted articular surface fragments at the fracture edges.
If there is articular surface impaction, it must be carefully elevated and reduced before reducing the medial malleolar fragment.
Anatomical Reduction
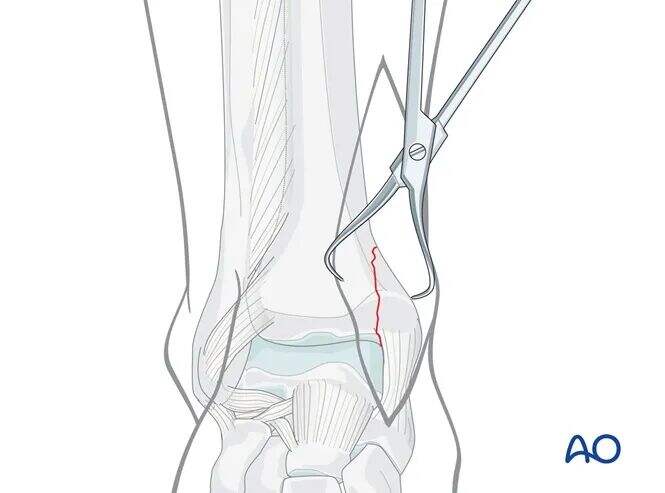
Perform anatomical reduction of the fracture using pointed reduction forceps, taking care to protect the soft tissues.
Depending on the fracture morphology and fragment size, a large reduction forceps applied through a separate small lateral incision may be necessary.
Avoid excessive periosteal stripping.
If there is an impacted, angular fracture fragment of the medial malleolus, the medial malleolus can be retracted medially ("open the book") to gently open the vertical fracture line.
The impacted "angular" fragment can often be identified by its articular cartilage, which may become visible after irrigation if necessary.
Carefully elevate the impacted fragment back into its anatomical position using a small elevator.
Then, reduce the medial malleolus, "closing the book."
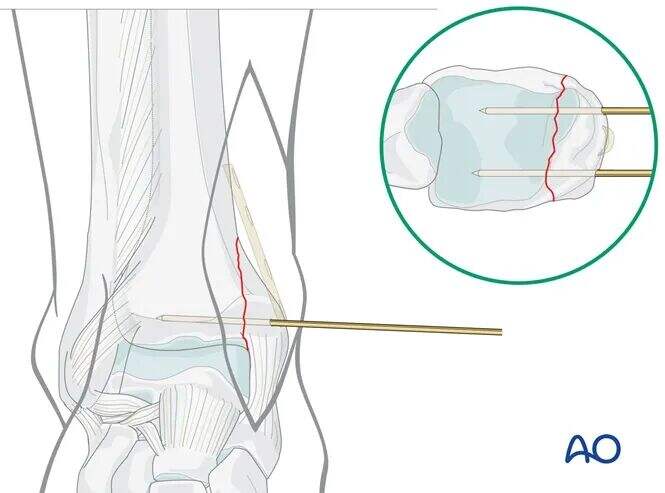
Temporary Fixation
Insert two 1.6 mm K-wires perpendicular to the fracture line, approximately 1 cm proximal to the level of the tibiotalar joint line.
As per preoperative planning, the K-wires should be placed anteriorly and posteriorly to avoid obstructing the planned plate position.
Confirm the reduction using image intensification (C-arm).
4. Fixation
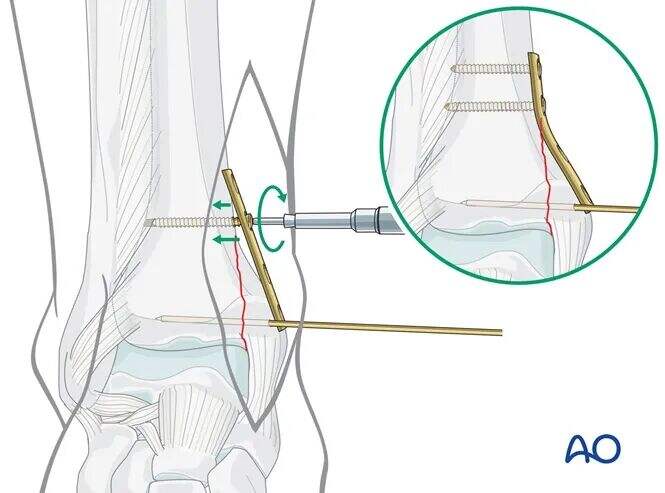
Plate Placement
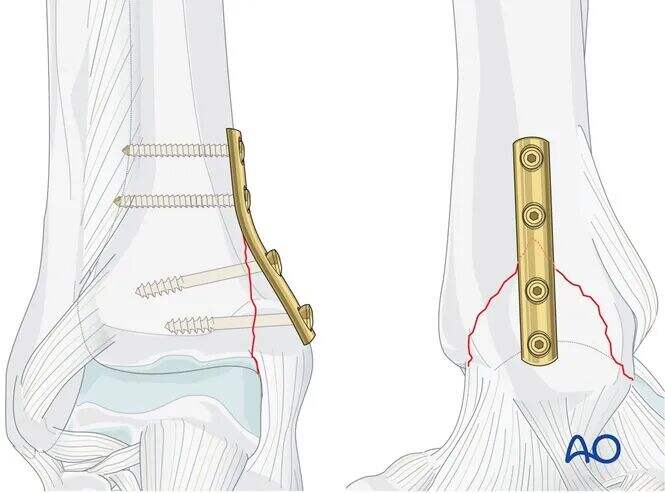
Contour a four-hole one-third tubular plate and place it manually so that two screw holes are proximal and two are distal to the fracture line.
Plan to place the first proximal screw close to the fracture.
This screw must be located within the tibia, approximately 3 mm proximal to the apex of the fracture.

Proximal Screw Insertion
Using a 2.5 mm drill bit with a protective sleeve, drill through both cortices, taking care not to penetrate excessively on the far side.
After depth measurement, tap both cortices using a 3.5 mm tap.
Gently place the (non-contoured) plate and insert the first 3.5 mm cortical screw.
As this screw is tightened, the plate will act as a buttress against the distal fragment.
Insert the second 3.5 mm proximal cortical screw using the same technique.
Distal Lag Screw Insertion
Using a drill sleeve, drill a 2.5 mm hole as perpendicular as possible to the fracture line, without penetrating the far (lateral) cortex.
Ensure absolutely that the ankle joint is not penetrated.
After depth measurement, tap only the medial cortex using a 4.0 mm cancellous bone tap.
Insert a 4.0 mm cancellous screw. It is critical that the threads of this screw completely cross the fracture line.
Insert the second distal lag screw using the same technique.

5. Postoperative Management for Infra- and Trans-syndesmotic Ankle Fractures
Apply a well-padded compression dressing with a posterior splint or slab, and elevate the limb for approximately 24 hours to minimize swelling and pain.
For anatomically reduced and stably fixed ankle fractures, early active mobilization and light partial weight-bearing can begin on the first postoperative day.
Weight-bearing should be delayed in osteoporotic patients.
Obtain follow-up radiographs at 1 week and then monthly until complete union is confirmed.
Gradually increase weight-bearing as tolerated.