EN
EN


How to Place a First-Stage External Fixator Safely in Pilon Fractures
Complex Pilon fractures or fracture-dislocation ankle fractures are often accompanied by severe soft-tissue injury. When combined with diabetes mellitus, peripheral vascular disease, long-term corticosteroid use, etc., the soft-tissue condition is even worse. These injuries usually require first-stage external fixation or skeletal traction, followed by second-stage definitive surgery.
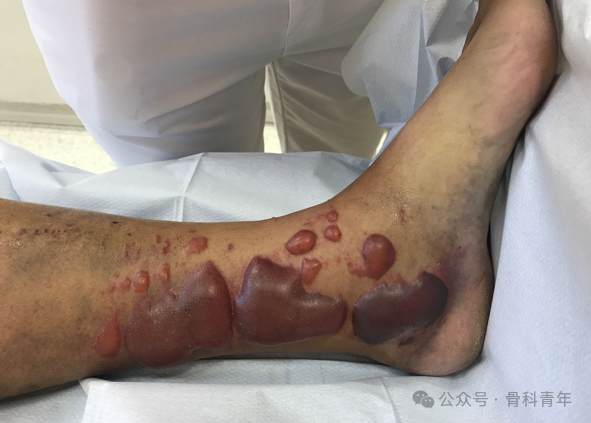
First-stage external fixator placement restores ankle rotation, alignment, and apposition. For severe closed/open soft-tissue injuries, compartment syndrome, and other critical conditions, it is a rapid means of protecting the soft tissues. Because previous first-stage definitive internal fixation had an extremely high complication rate, staged treatment — span–scan–plan: spanning external fixation → CT → definitive surgical planning — has become the standard approach for the vast majority of Pilon fractures.
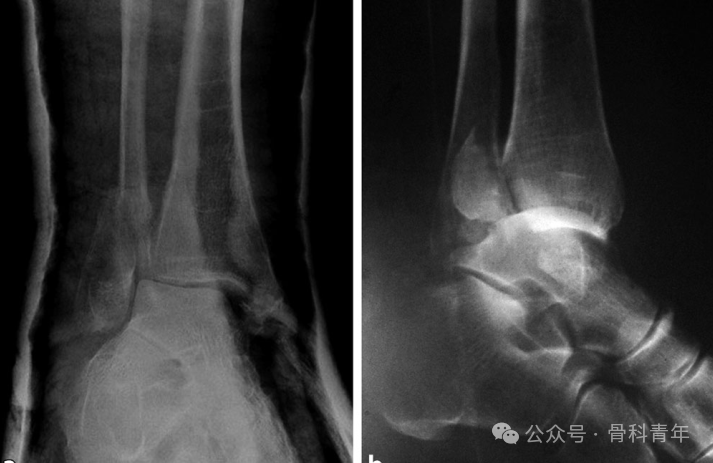
Drawing on the foreign literature, this article shares pin placement techniques for first-stage ankle spanning external fixation as a reference for orthopedic surgeons.
Surgical Steps
I. Anesthesia, Positioning, and Preoperative Planning
Anesthesia may be general endotracheal anesthesia, regional block, or neuraxial anesthesia. The patient is placed supine on a fracture table to facilitate intraoperative AP and lateral fluoroscopy. A soft pad is placed under the injured calf, and the contralateral lower limb is lowered appropriately to avoid overlap on lateral fluoroscopic images. The foot and lower leg are fully prepped and draped.
Pin planning: The surgeon must be familiar with the anatomy of tendons, neurovascular structures, and muscles, as well as the fracture pattern, while avoiding interference with subsequent definitive internal fixation. The shaded area in the figure represents the tibial safe zone. Place two approximately 4.5-mm cortical Schanz screws in the tibia. The distal screw should be at least 5 cm proximal to the fracture. The screws should be 7–8 cm apart. The connecting rod should be as close to the bone as possible, without compressing the soft tissues, to improve overall frame stiffness.
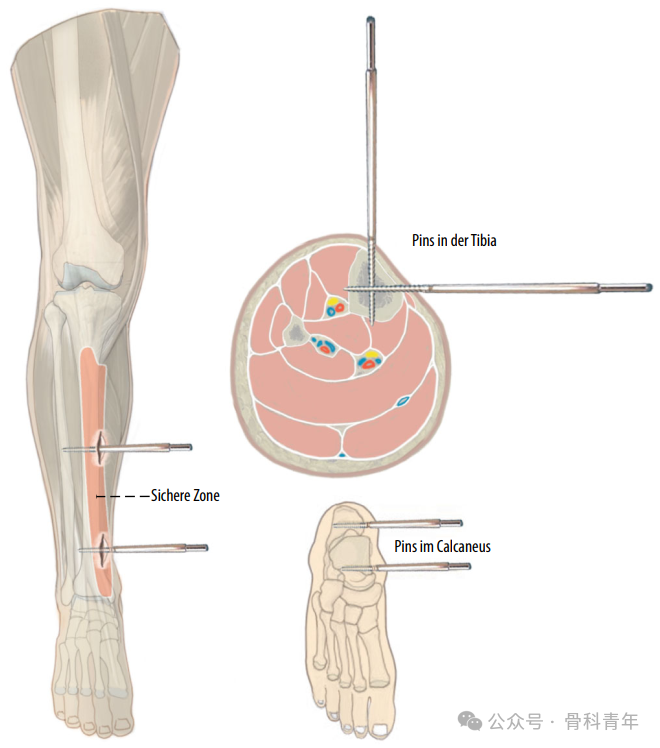
II. Tibial Screw Insertion
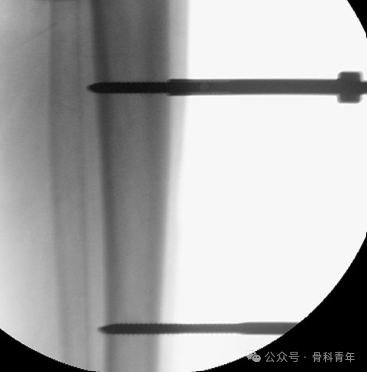
Make a skin stab incision of approximately 0.5 cm over the palpable anterior tibial crest. Bluntly dissect the soft tissues down to bone with a hemostat or scissors. Drill under cooled irrigation using a soft-tissue protection sleeve. The tibial shaft is triangular, making screw placement challenging. It is recommended to first drill perpendicular to the anteromedial tibial cortex, then adjust the drill angle to complete screw insertion. If the screw is too medial and not in the sagittal plane, it may press against the contralateral calf when the patient is in bed, causing injury.
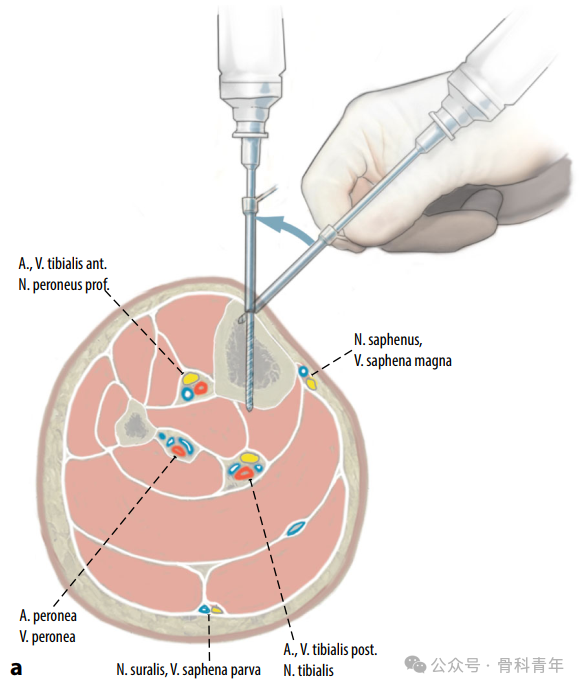
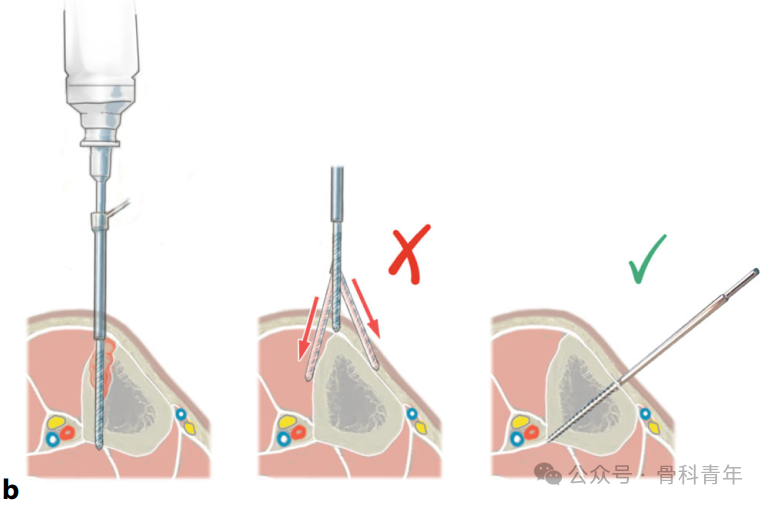
Insert a 4.5-mm Schanz screw with bicortical fixation. The screw should not penetrate the posterior tibial cortex.
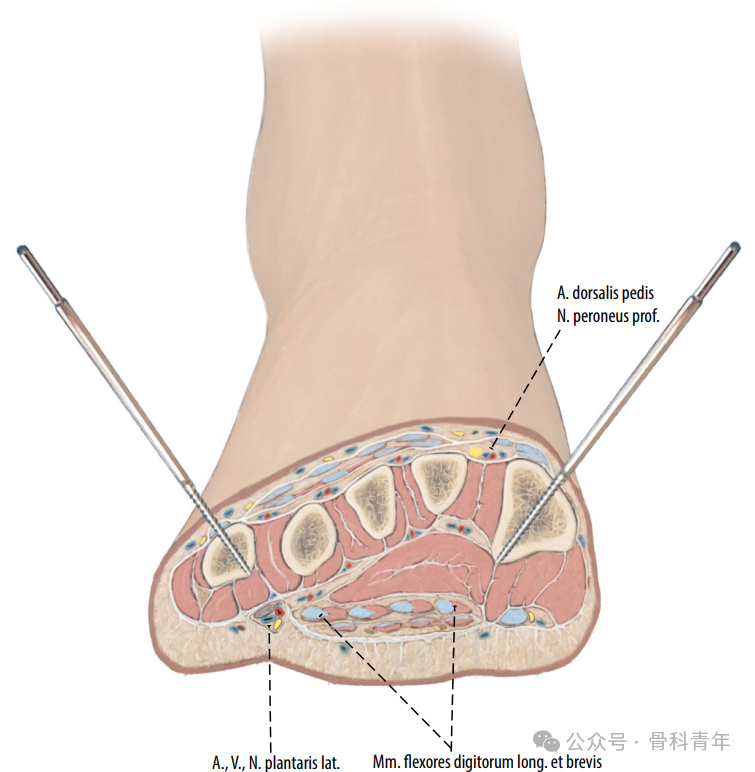
III. Metatarsal Screw Insertion
Place Schanz screws in the midshaft of the first and fifth metatarsals. Insertion from the lateral side near the base carries a risk of injuring a communicating branch of the dorsalis pedis artery. Angle the screws at 45° to create a V-shaped configuration. Use 2.5–3.0-mm Schanz screws, avoiding the extensor tendons.
IV. Calcaneal Screw Insertion
For Pilon fractures or highly unstable ankle fractures, a calcaneal screw should also be placed. Insert a centrally threaded Schanz screw into the calcaneal tuberosity from medial to lateral, following an imaginary semicircle along the posterior border of the calcaneal tuberosity, avoiding the medial neurovascular bundle, and selecting the region of greatest cortical strength at the posterior border of the calcaneal tuberosity.
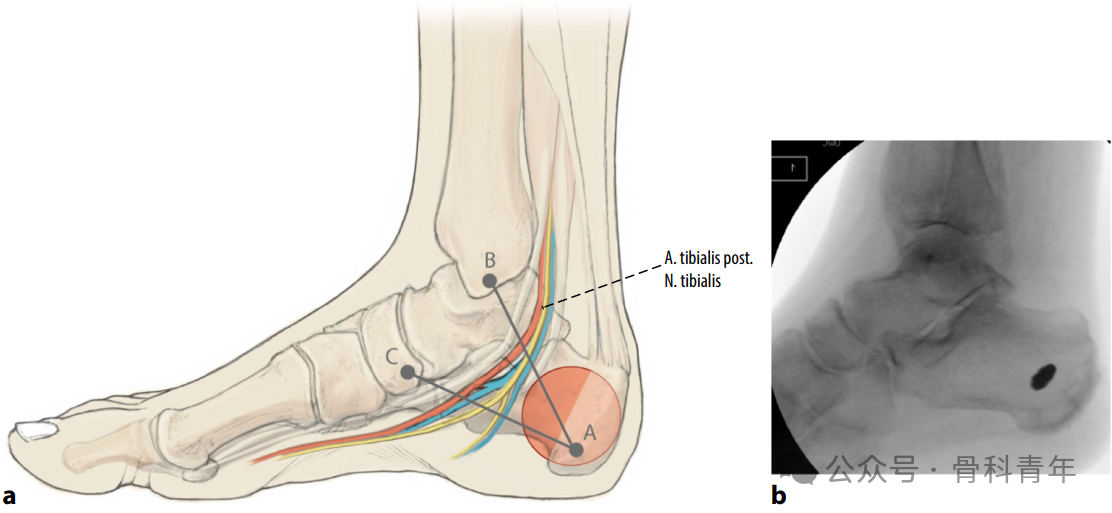
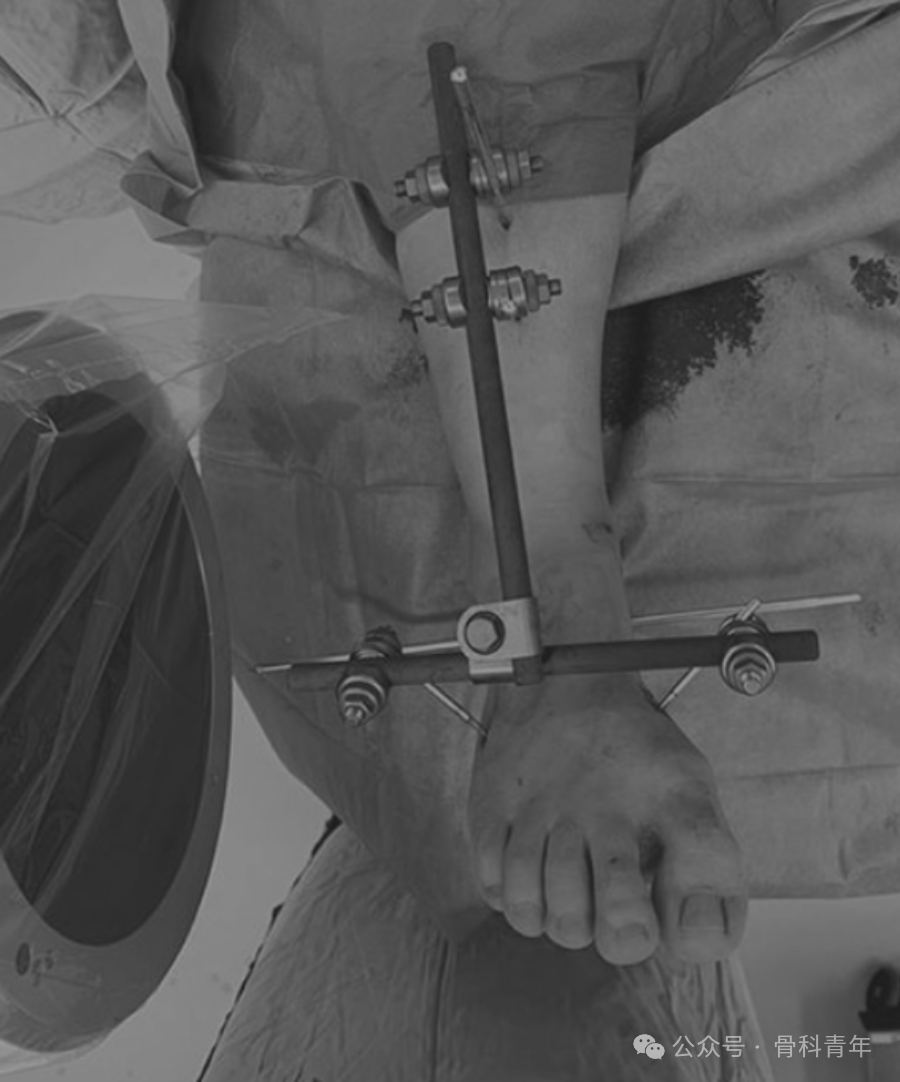
Note: This figure has been converted to black and white.
With the ankle maintained in a neutral position, tighten the connecting rod clamps under axial traction and alignment correction. A simple T-shaped frame is used for relatively stable injuries. Tube-to-tube clamps should be placed outside the X-ray projection path so that intraoperative fluoroscopy can assess the quality of joint reduction.
The calcaneal screw is connected to the tibial screws in a V configuration to form a Delta triangular frame. Keep the connecting rods close to the bone while leaving space for swelling to avoid skin compression. A second connecting rod can be added to further increase stiffness.
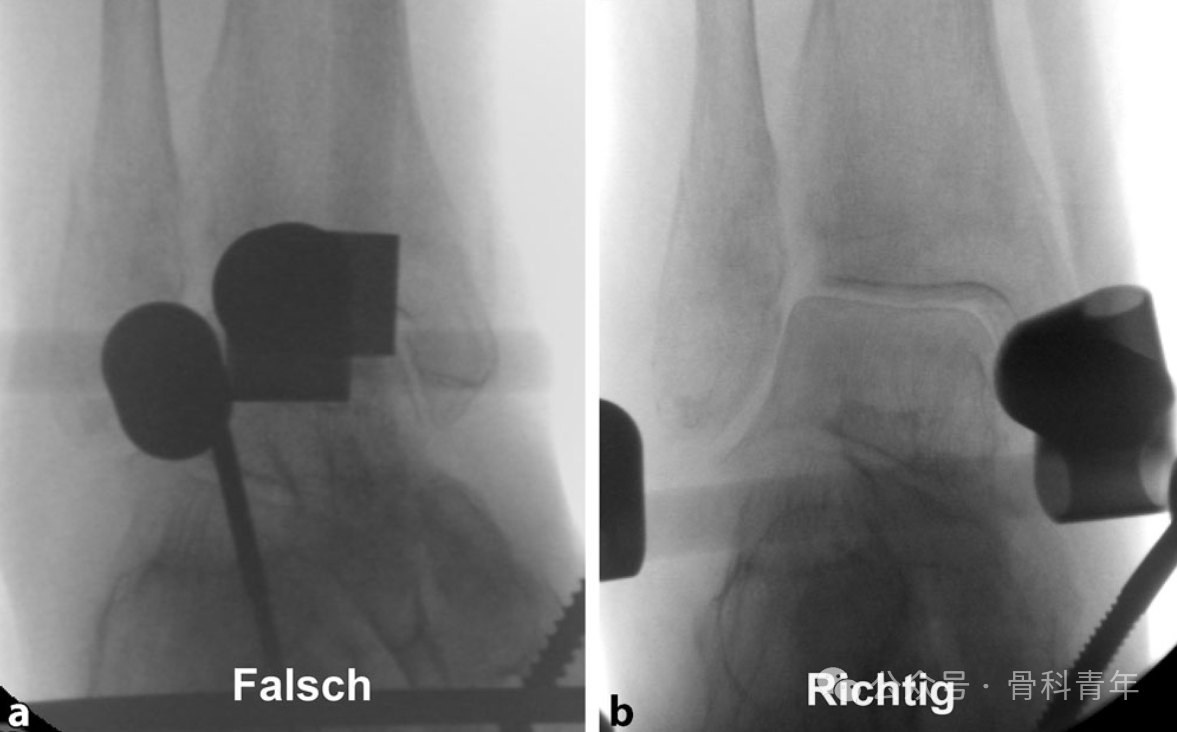
Note: This figure has been converted to black and white.
Note: Screws must not be placed intra-articularly, to avoid joint infection. Talar pin placement should also be avoided as much as possible.