EN
EN


How to Precisely Place Poller (Blocking) Screws?
In long-bone oblique fractures at the metaphyseal–diaphyseal junction, achieving a good outcome with intramedullary nailing can be challenging. There is a strong tendency for axial displacement, often accompanied by characteristic malalignment of the short bone segment. Blocking screws are effective adjuncts for fracture reduction. This article describes a method for placing blocking screws to ensure precise insertion, thereby maximizing their utility and achieving an excellent overall result.
Method
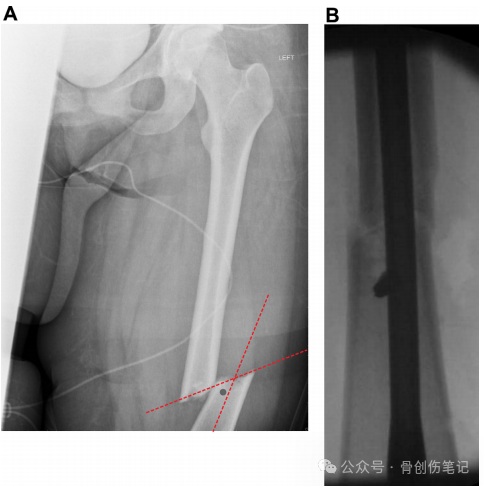
First, draw a line along the long axis of the displaced, widened bone segment. Then, draw a second line along the fracture plane, ensuring it intersects the first line. Since nearly all metaphyseal fractures have some degree of obliquity, this creates 4 angles: 2 acute and 2 obtuse.
To achieve proper reduction, the screw should be placed within the acute angle. By placing the screw in the widened or widest portion—where it can best overcome any size mismatch between the implant and the metaphyseal diameter—a single screw may suffice, and this should be the preferred site for the first screw. When the intramedullary nail contacts the screw, the nail's trajectory should be deflected so that the displaced segment is reduced in the desired direction, facilitated by the tight mechanical fit provided by the narrower metaphyseal diameter.
If a second screw is needed, it should be placed in the other acute angle (which is closer to the isthmus and therefore less effective) but will augment the effect of the first screw. For more complex fractures, this technique may also be used to place screws in multiple planes.
Step‑by‑Step Procedure
1. Draw a line along the long axis of the displaced, widened bone segment.
2. Draw a second line along the fracture plane, ensuring it intersects the first line.
3. Identify the acute angles (Figures 1 and 2).
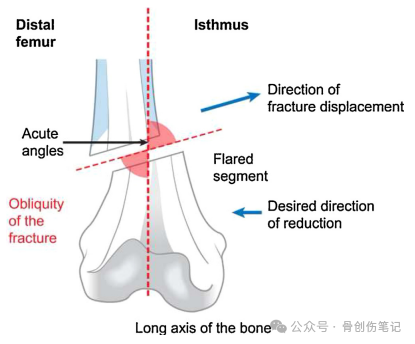
Figure 1. This illustration shows a distal femoral oblique fracture, demonstrating how to identify the acute angles and indicating the ideal reduction direction required to overcome the displacing forces and achieve precise reduction.
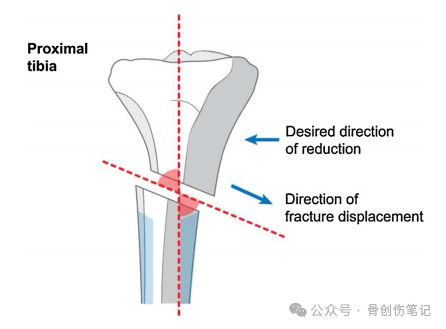
Figure 2. An illustration of a proximal tibial oblique fracture with an obliquity direction opposite to that shown for the distal femur.
4. Place the screw in the acute angle within the metaphyseal or widened segment.
5. Insert a guide wire under fluoroscopic guidance, ensuring that the wire tip passes from the correct side to guarantee reduction.
6. Insert the intramedullary nail; as the nail contacts the screw, it should be deflected, thereby providing reduction and compression at the fracture site (Figures 3 and 4).
7. If adding a second screw can further improve reduction, place it in the acute angle closer to the isthmus.
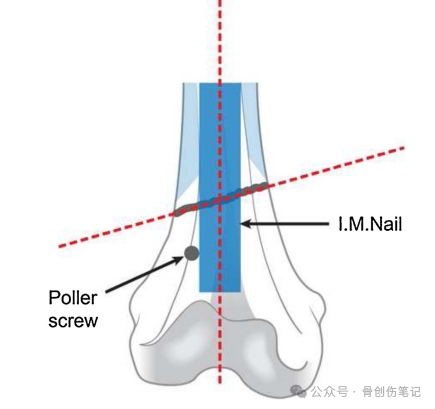
Figure 3. The intramedullary nail contacts the blocking screw placed in the acute angle of the widened segment (in this case, the distal segment), precisely reducing a distal femoral fracture.
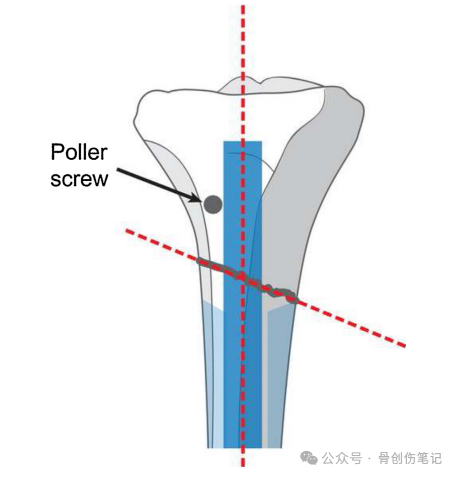
Figure 4. The intramedullary nail contacts the blocking screw placed in the acute angle of the widened segment (in this case, the proximal segment), precisely reducing a proximal tibial fracture.
Clinical Examples
Tibial Fracture
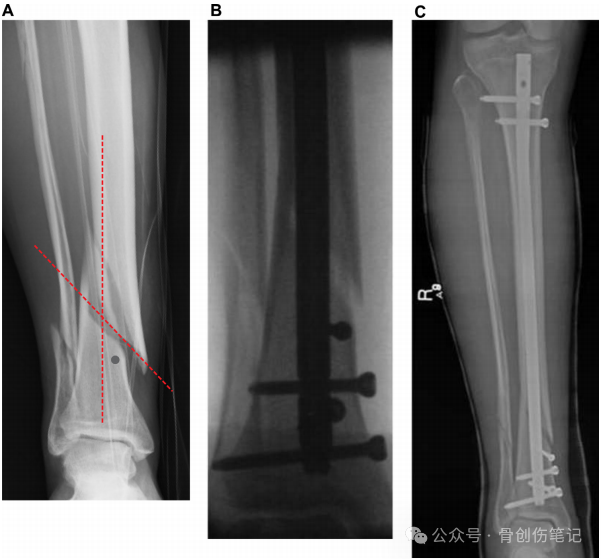
The first screw should be placed in the acute angle of the widened segment, as indicated by the blue circle (Figure 5). Intraoperative fluoroscopy shows good reduction, and postoperative imaging confirms maintenance of reduction.
Distal One‑Third Diaphyseal Femoral Oblique Fracture
The obliquity direction in this case is opposite to that in the previous figure, but the same principle applies: the screw should be placed in the acute angle of the widened segment. Intraoperative fluoroscopy demonstrates satisfactory reduction (Figure 6).